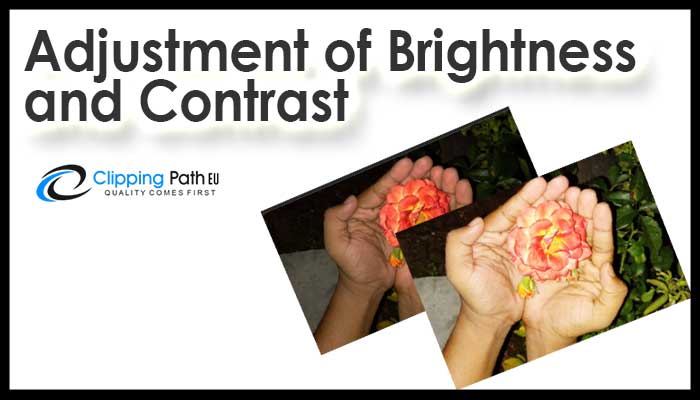
Clipping Path EU– share about an article on the adjustment of Brightness and Contrast in Photoshop.

Stage 1: Add A Brightness/Contrast Adjustment Layer
A while ago when we were figuring out how to apply Brightness/Contrast as a static charge, the primary thing we expected to do was make a duplicate of our picture and place it on another layer. That way, we could apply the modification without hurting the first picture. With alteration layers, there’s no compelling reason to do that since they’re totally non-dangerous. We should simply include one, and there’s a couple of approaches to do it. One is by going up to the Layer menu in the Menu Bar along the highest point of the screen, picking New Adjustment Layer, at that point picking Brightness/Contrast:
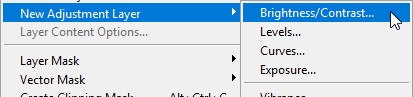
Going to Layer > New Adjustment Layer > Brightness/Contrast.
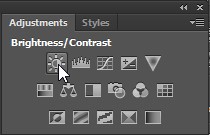
Another clipping path is by tapping on the Brightness/Contrast symbol in Photoshop’s Adjustments board. It’s the main symbol on the left, top line (the name of every change layer will show up as you drift your mouse cursor over the symbols):
Tapping the Brightness/Contrast symbol in the Adjustments board
In case you’re not seeing the Adjustments board on your screen, go up to the Window menu where you’ll discover a rundown of the considerable number of boards accessible in Photoshop, at that point pick Adjustments. A check mark beside the name implies the board is as of now open, so you may simply need to search for it (as a matter of course, it’s settled in with the Styles board, or as of CS6, with the Styles and Libraries boards). In the event that you don’t see a checkmark, select the Adjustments board to open it:
Choosing the Adjustments board from under the Window menu.
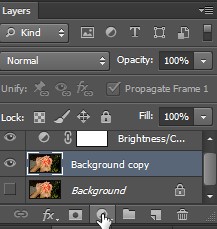
The third method for including a Brightness/Contrast modification layer, and the one I tend to utilize the most, is by tapping on the New Fill or Adjustment Layer symbol at the base of the Layers board:
Nothing will happen to the picture presently, yet another Brightness/Contrast modification layer shows up over the picture in the Layers board:
The Layers board demonstrating the Brightness/Contrast modification layer.
Stage 2: Click The Auto Button
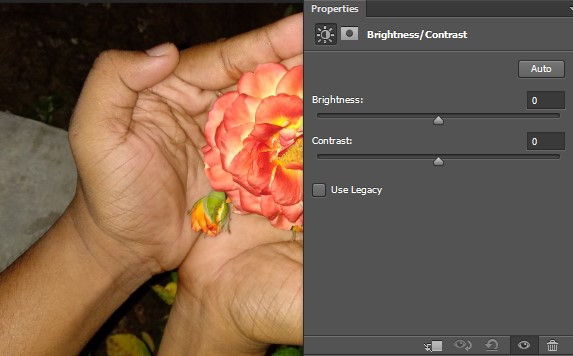
When we connected Brightness/Contrast as a static charge, the alternatives and controls for it opened in a different exchange box. With alteration layers, they show up in the Properties board which was added to Photoshop in CS6. Here, we see a similar Brightness and Contrast sliders, the Auto catch, and the Use Legacy alternative, all of which we shrouded in detail in the past instructional exercise:
The Brightness/Contrast choices on the Properties board.
Similarly as previously, the main thing we’ll normally need to do is tap the Auto catch, which gives Photoshop a chance to contrast your picture and comparative pictures from other expert photographic artists as it tries to make sense of the perfect brilliance and differentiation settings:
Tapping the Auto catch.
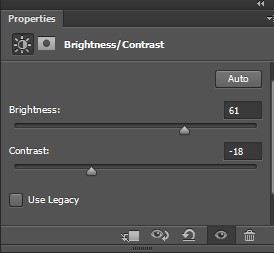
For my situation, Photoshop chose to set the Brightness to 54 and the Contrast to 66. Obviously, each picture is extraordinary so in case you’re following alongside your own photograph, odds are these qualities will be unique:
Stage 3: Adjust The Brightness And Contrast Sliders
In the event that you figure your picture could, in any case, look better subsequent to attempting the Auto catch, you can make promote alterations utilizing the Brightness and Contrast sliders. Dragging a slider to the correct builds brilliance or complexity. Drag to one side to diminish brilliance or complexity.
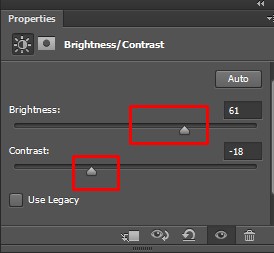
I like what Photoshop thought of generally. However, I think I’ll bring down the Brightness esteem somewhat, down to possibly 45 or something like that. And I’ll build the Contrast to 75. Once more, this is only my very own inclination with this particular picture. You’ll need to watch out for your photograph in the report as you drag the sliders to think of the settings that work best for you:
Physically altering splendor and appear differently in relation to the sliders.
Here’s my photograph subsequent to making my own particular manual modifications. For correlation, the first, untouched rendition is on the cleared out. The balanced rendition is on the right:
A “prior and then afterward” correlation of the Brightness/Contrast alteration.
The “Utilization Legacy” Option
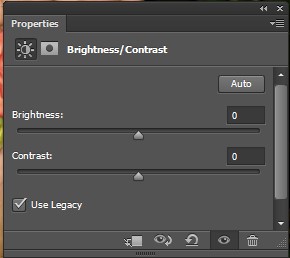
Similarly, as with the static rendition of the Brightness/Contrast order, the alteration layer adaptation incorporates a Use Legacy option which tells the Brightness/Contrast charge to carry on the way it did before Photoshop CS3. I won’t invest a considerable measure of energy in it here on the grounds that I shrouded it in detail in the past instructional exercise, however similarly as a snappy refresher (and for any individual who hasn’t yet perused the past instructional exercise), I’ll click inside its checkbox to choose (it’s killed as a matter of course):
Choosing the Use Legacy alternative
Utilize Legacy tells the Brightness/Contrast charge to act the way it did precede Photoshop CS6. When Adobe made significant changes to it. In those days (in CS2 and prior), the main thing Brightness/Contrast did extremely well was pulverize your picture. As a snappy case, with Use Legacy turned on, I’ll drag both the Brightness and Contrast sliders the distance to one side, expanding both to their greatest esteem. This outcome in a totally extinguished picture (with bizarre shading ancient rarities). That is on account of all Photoshop did was push the pixels in the picture to extremes, sending the lighter tones to unadulterated white and the darker tones to unadulterated dark:
The picture with Use Legacy on and both Brightness and Contrast set to their most extreme qualities.
By examination, a similar increment in Brightness and Contrast brings about a picture. That, while certainly too splendid, still holds the greater part of its detail when the Use Legacy choice is left off:
A similar increment in Brightness and Contrast however with Use Legacy off
In like manner, on the off chance that I betray and drag the Brightness and Contrast sliders the distance to one side, diminishing them to their base qualities. I get a picture that is not just excessively dull; it has no detail staying by any stretch of the imagination:
Bringing Brightness and Contrast down to their base qualities with utilizing Legacy on
With Use Legacy off, a similar diminishing in Brightness Contrast still keeps the majority of the picture detail in place. There’s no motivation to empower the Use Legacy choice nowadays (aside from in cases like this where you simply need to look at the old variant of Brightness/Contrast with how much better it functions today). It’s killed of course, and it’s best to simply abandon it off:
Something you may have seen is that the Properties board does not have a similar Preview alternative that we saw with the static form of Brightness/Contrast. The Preview alternative enabled us to incidentally conceal our alterations in the record so we could see our unique picture. Does that mean we can’t do that with an alteration layer? Not a chance! It just means there’s no genuine Preview alternative, yet there’s as yet a simple method to do it. Basically, tap the layer permeability symbol at the base of the Properties board to flip the Brightness/Contrast modification layer on and off.
With it off, you’ll see your unique picture by and by in the report:
The first, uncorrected picture
Tap a similar permeability symbol again to walk out on and see the picture with your Brightness and Contrast settings connected. This makes it simple to contrast the two renditions with ensuring you destined for success:
The adjusted variant
On the off chance that that little eyeball symbol in the Properties board looks commonplace, that is on account of it’s a similar permeability symbol that is found in the Layers board, and they both do a similar thing. Clicking it is possible that one flips the alteration layer on and off.
Whenever you can reset both the Brightness and Contrast sliders back to their default estimation of 0 by tapping the Resection at the base of the Properties board:
On the off chance that we were applying Brightness/Contrast as a static change, we would need to click OK in the exchange box to acknowledge our settings and submit them to the picture, and soon thereafter the pixels on the layer would be forever changed. With modification layers, there’s never a need to do that since they remain perpetually editable, with no misfortune in picture quality. To demonstrate to you what I mean. I’ll add a moment change layer to my archive, this time picking a Vibrance acclimation to support the hues. To include it, I’ll click its thumbnail in the Adjustments board:

Including a Vibrance change layer
Notice that by including this new change layer. My Brightness/Contrast settings on the Properties board (upper right corner of the screen capture underneath) have been supplanted by the Vibrance settings. Since this isn’t an instructional exercise on how Vibrance functions. I’ll just rapidly increment my Vibrance incentive to around 30 and the Saturation incentive to 10:
The Properties board presently demonstrates choices for the Vibrance alteration, not Brightness/Contrast.
On the off chance that I need to backpedal now and re-alter my Brightness/Contrast settings. I should simply tap on the little thumbnail symbol on the Brightness/Contrast layer on the Layers board:
Tapping the Brightness/Contrast thumbnail symbol.
This chooses the Brightness/Contrast modification layer and changes the Properties board back to the Brightness/Contrast settings so I can roll out whatever improvements I require:
The Properties board demonstrates the settings for whichever change layer chosen at present
What’s more, there we have it! That is the manner by which to effortlessly enhance the general splendor and difference of a picture, and keep your settings both completely editable, and non-dangerous, by applying Brightness/Contrast as an alteration layer in Photoshop! In the following instructional exercise. We’ll figure out how to reestablish shrouded detail in the shadows and features of a picture with Photoshop’s.
Check out our>>> Color Correction service.
Learn more: