
Today we are praising the dispatch of Photo Dune, Clipping Path EU new stock photography site with a progression of photograph impact and photograph control instructional exercises that exhibit the pictures from our new commercial center. In this instructional exercise, we will figure out how to apply a shading impact to a photograph Color Correction. The photograph utilized as a part of this instructional exercise is accessible for nothing for PSD Premium Members. How about we begin! After following this tips you can learn about Applying Color Effect in Photoshop.
Instructional exercise Assets
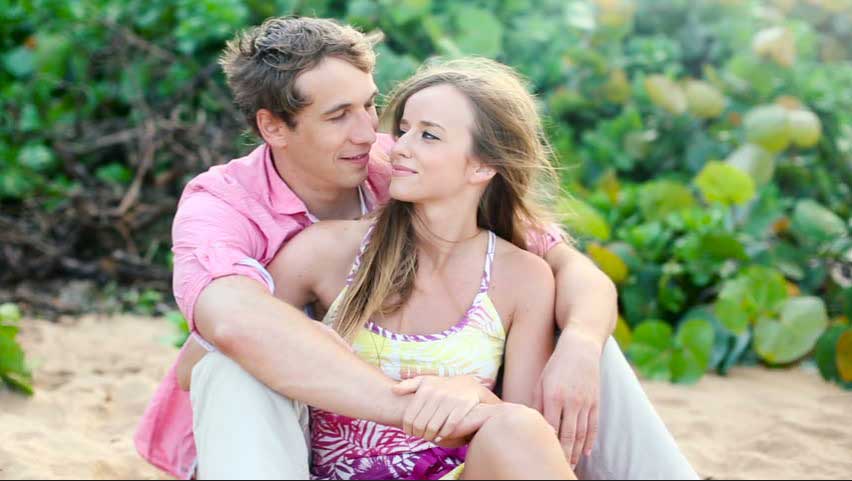
The accompanying photograph was utilized amid the generation of this instructional exercise. We have allowed a complimentary individual permit to PSD Premium Members for the stock photographs utilized as a part of this instructional exercise. They can be gotten to in the source records of your premium download. On the off chance that you are not a top notch part, you can download the pictures utilized as a part of this instructional exercise beneath.
Stage 1
Open your picture in Photoshop.
Stage 2
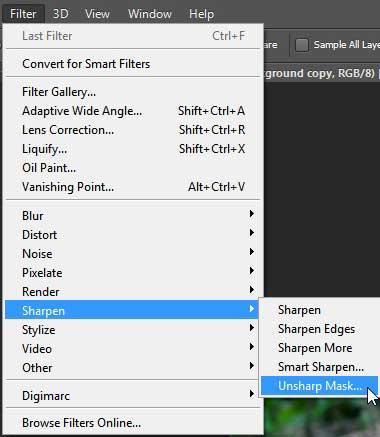
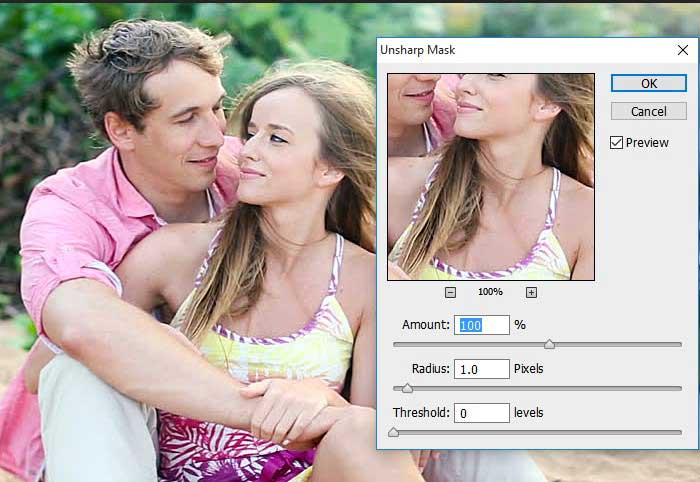
Copy the picture layer and apply an Unsharp Mask by going to Filter > Sharpen > Unsharp Mask. Apply the accompanying settings: Amount: 100, Radius: 1.0, Threshold: 0. Layer ought to be set to Normal at 100% mistiness.
Stage 3
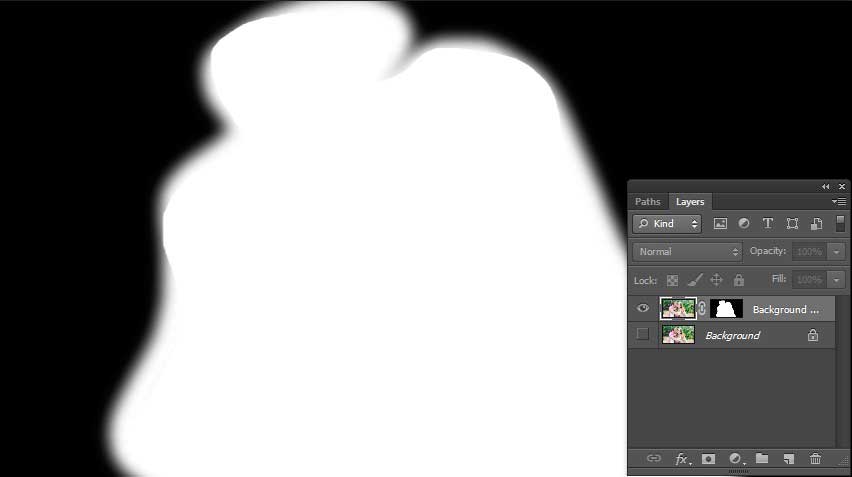
Presently we have the picture honed, however, we just need our subject in concentrate, so we should influence a layer to cover and paint in a few spots to include profundity and evacuate the hone.
Stage 4

Presently we should chip away at the lights and shadows of our characters, raising the level of these to get more emotional and all the more intriguing impact. To do this we will go to New Layer > Image > Apply Image and press OK with the default settings.
Stage 5
Utilize the Dodge and Burn devices to feature the lights and shadows of our subjects. When you are done, set the darkness of the layer to 40%.
Stage 6
Go to Layer > New Adjustment Layer and apply an inclination outline dark to white. Set the haziness to 30%. With the pen apparatus, draw a cover as demonstrated so the slope outline applies to our characters.
Stage 7
How about we begin functioning the shading, make another alteration layer of Curves and we will work in the Blue channel rather the RGB one. My settings are the ones in the photo, however, don’t be reluctant to transform it to the point that you are content with the outcome. This layer is in typical mode at 100% of murkiness
Stage 8
Include another Gradient Map from Black to White to marginally bring down the immersion of the past bends. The layer will be in ordinary mode at 40% of mistiness.
Stage 9
To continue playing with the hues we will include a Photo Filter by going to Layer > New Adjustment Layer > Photo Filter. Apply the Underwater channel at 25% thickness. Set the layer to 20% haziness.
Stage 10
Go to Layer > New Adjustment Layer > Photo Filter > Warming Filter (85) at 25% thickness. Set the layer to 60% darkness.
Stage 11
Go to Layer > New Adjustment Layer > Hue/Saturation and change the immersion to +11. Set the layer to ordinary at 100% haziness.
Stage 12
Go to Layer > New Adjustment Layer > Curves. Select the blue channel and set the parameters as appeared. Do until the point that you are content with the outcome.
Stage 13
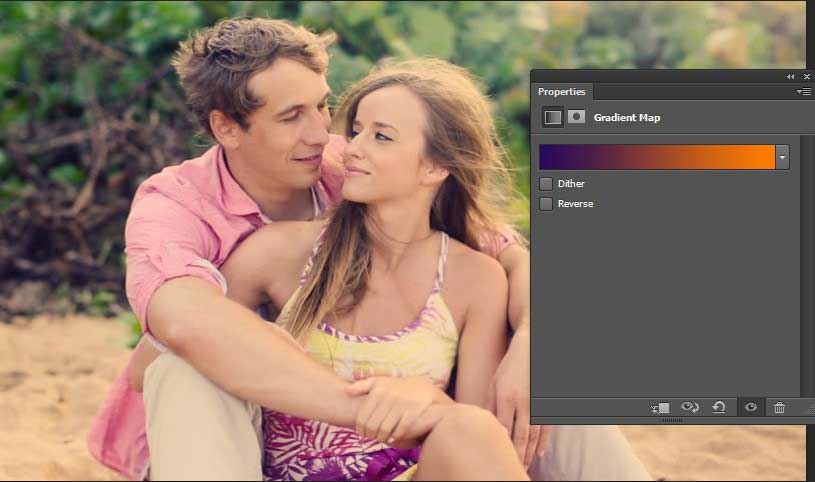
Go to Layer > New Adjustment Layer > Gradient Map and apply a Violet to Orange in Light mode at 10% darkness.
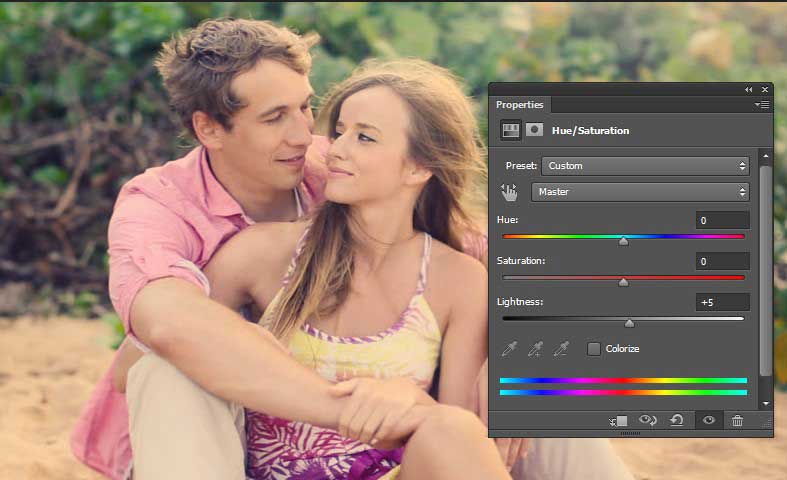
Stage 14
Go to Layer > New Adjustment Layer > Hue/Saturation. Change the delicacy to +5. Set the layer mode to type at 100% mistiness.
Stage 15
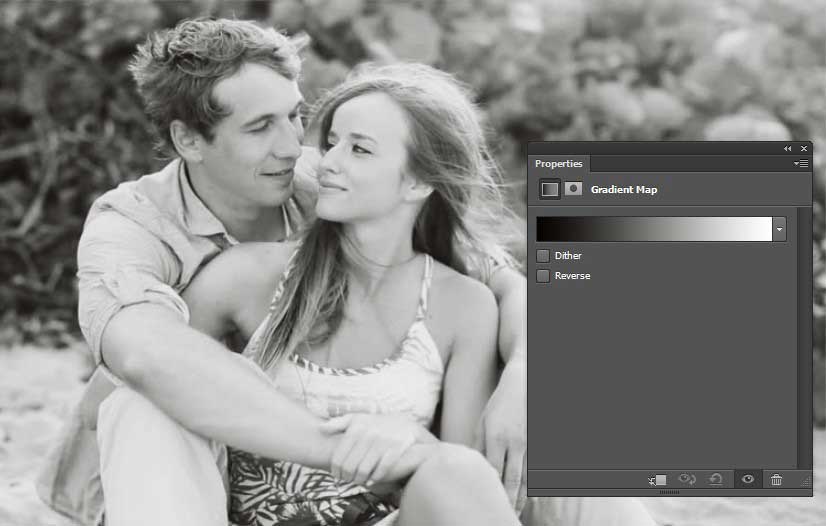
Go to Layer > New Adjustment Layer > Gradient Map and include another angle outline dark to white. Set it to delicate light mode at 16% mistiness.
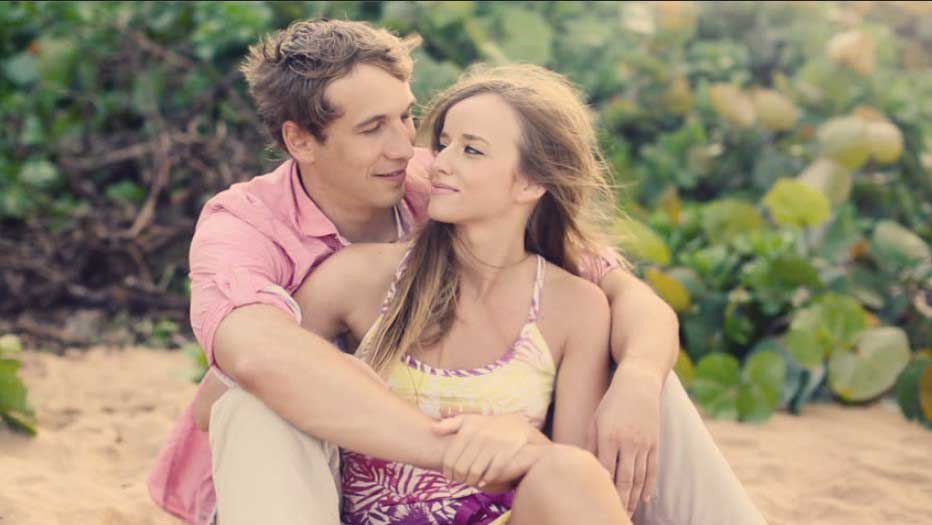
This is the final image-
Learn more: Jewelry Clipping Path


