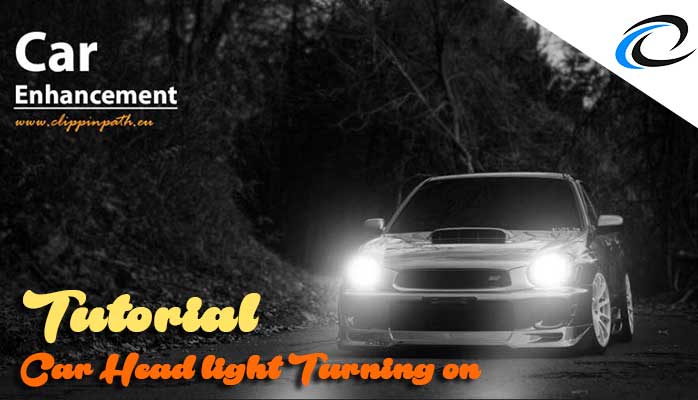
Hello, here Clipping Path EU showed you an awesome and fantastic Car Light Effect Photoshop (Car Head light Turning On effect tutorial in Photoshop).
You are amazed while you make this one by yourself and enjoy it.
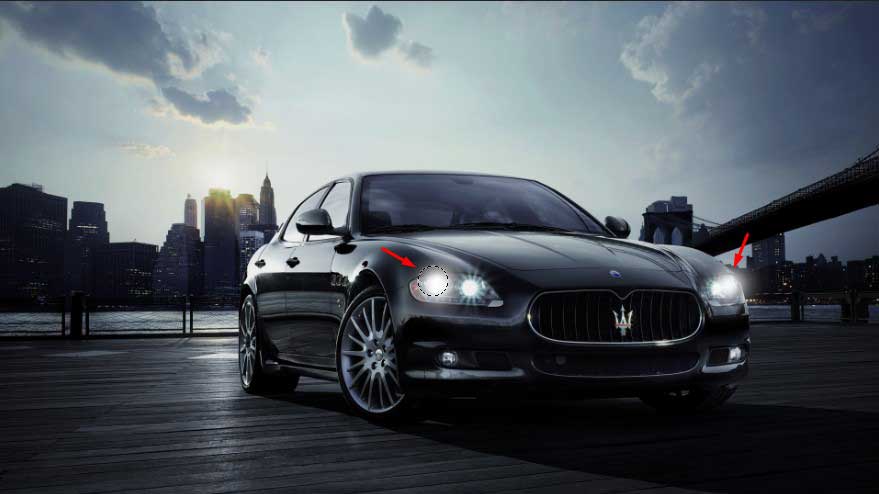
In this Photoshop instructional exercise, I will demonstrate to you industry standards to turn on the lights in a photograph. I made this auto composite where I shot both the auto and the foundation amid the day, cut out the auto and dropped it into this scene. I changed the temperament to evening time and in addition a sprinkling evening. The enormous issue with this composite is that the auto’s lights are off and we require them on. That is the thing that we will learn in this tut (Car Light Effect Photoshop).
Step by Step you can learn Car Light Effect Photoshop Tutorial
Stage 1
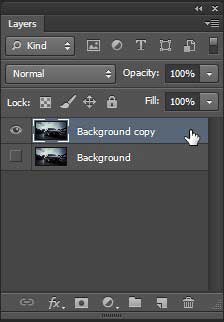
Open the main image in Photoshop.
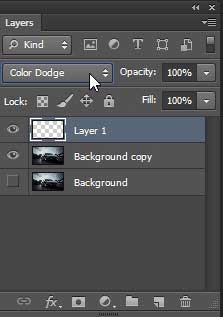
Copy the background layer and turn off the original layer.
Make another layer and change it to shading Dodge mixing mode-
Stage 2
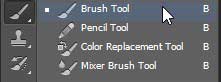
Pick a delicate white brush and change the size to generally a similar size at the light.
Stage 3
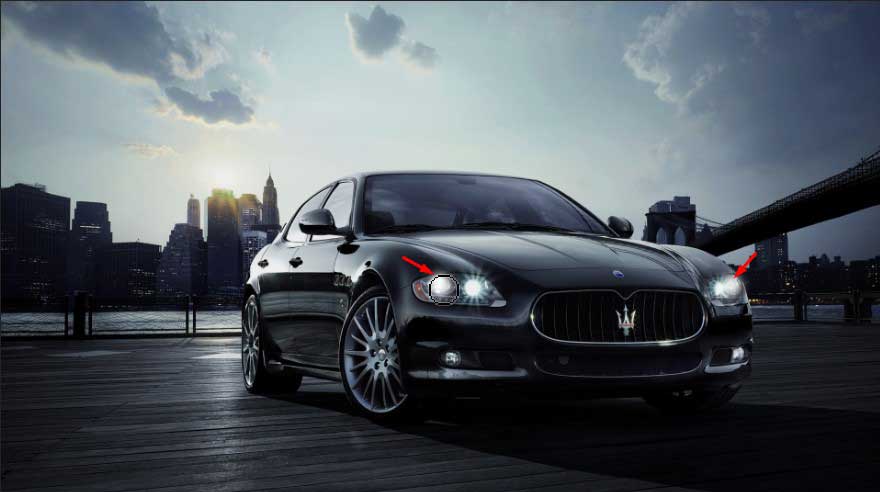
Snap with the brush to include a shining impact the light. Here and there you may need to apply it more than once, contingent upon the outcome.
Stage 4
So the same for every one of the lights in the scene (all on a similar layer)
Stage 5
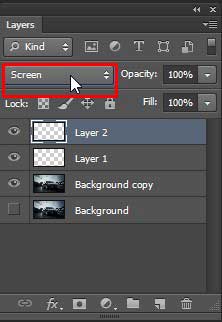
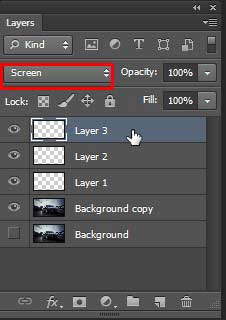
We now require a gleam around the lights, as genuine lights spread. Make another layer and change it to Screen mode.
Stage 6
Change the brush mistiness to 40% (you could simply change the layers murkiness later you incline toward)
Stage 7
Pick a bigger brush this time and ensure the forefront shading is set to white. Spot the brush on the lights to make the shining impact.
For this situation, I connected the brush 2x on each light.
Stage 8
Presently for a few bars. Make another layer and set it to Screen mode-
Stage 9
Paint a few lines underneath the lights, make the brush estimate the same as the lights.
Stage 10
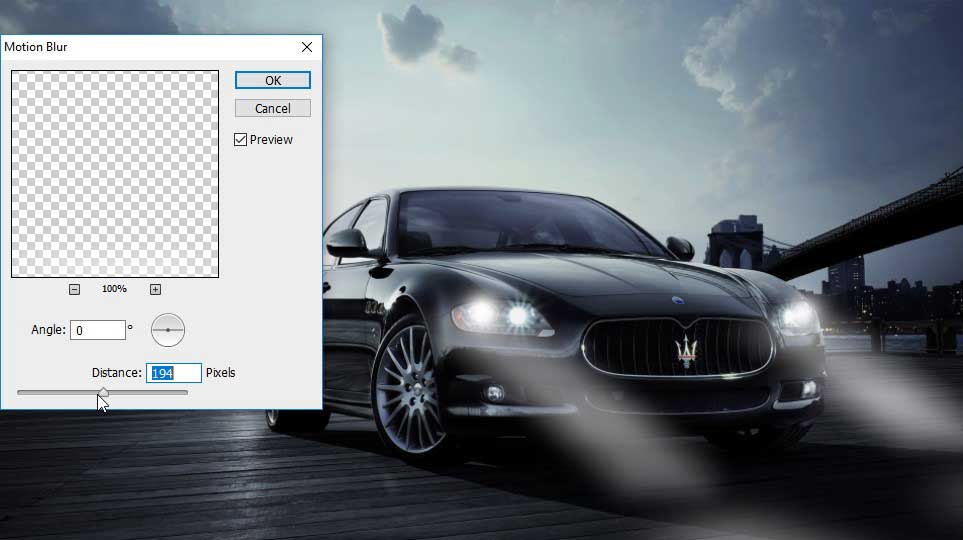
Pick Filter>Blur>Radial Blur.
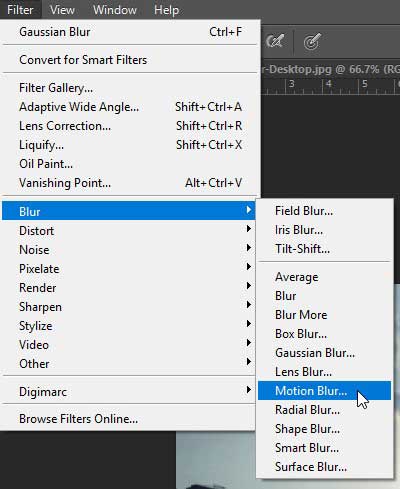
Select zoom and set it to around 44
Stage 11
Here you can see the lights smoothness out to bars (Sometimes I likewise apply a gassing obscure now, I didn’t on this picture, yet it may have looked better).
You can add Gaussian Blur for the more realistic look.
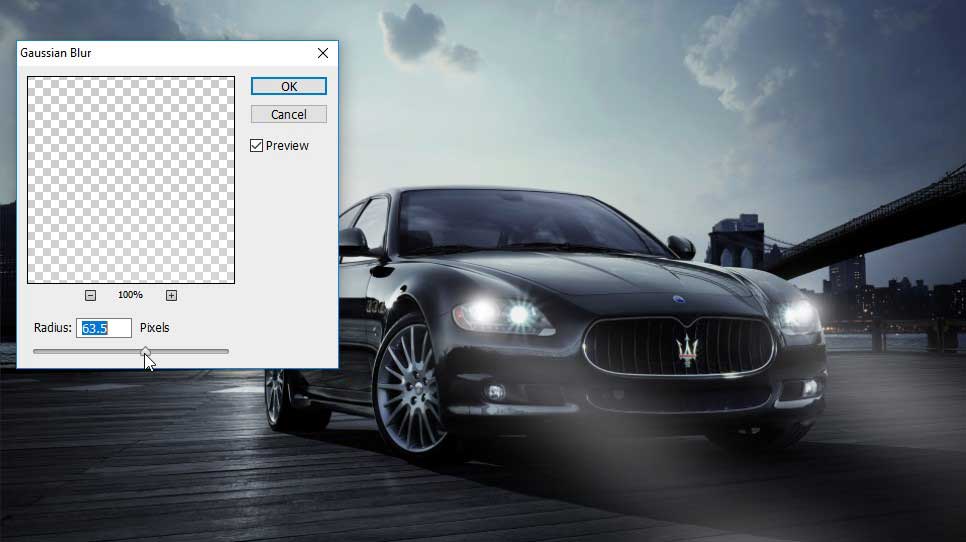
Change the darkness to suit your tastes.
So, hope this tutorial is enjoyable to you and you are eager to do that such kind of effect yourself.
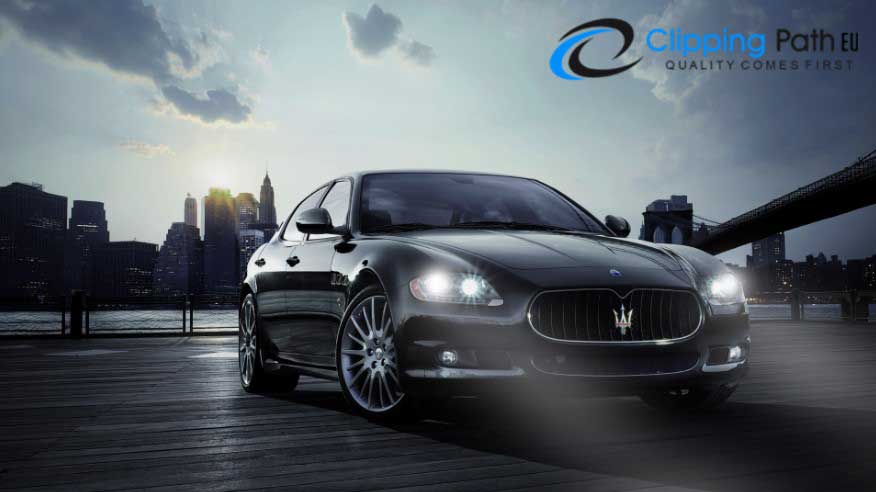
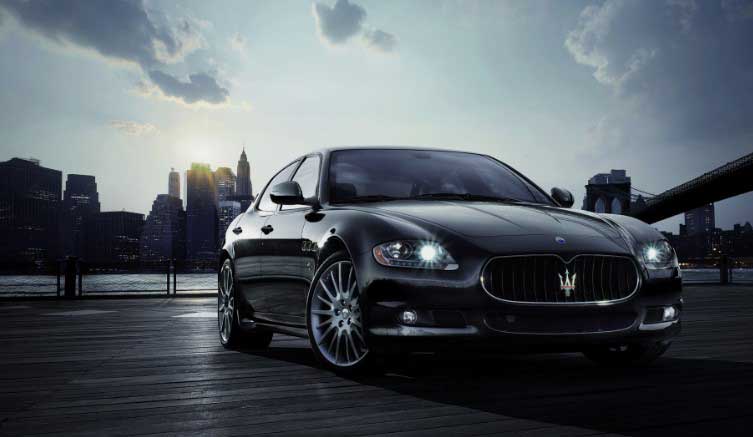
Here are some another sample –
Image 1:
Before Effect
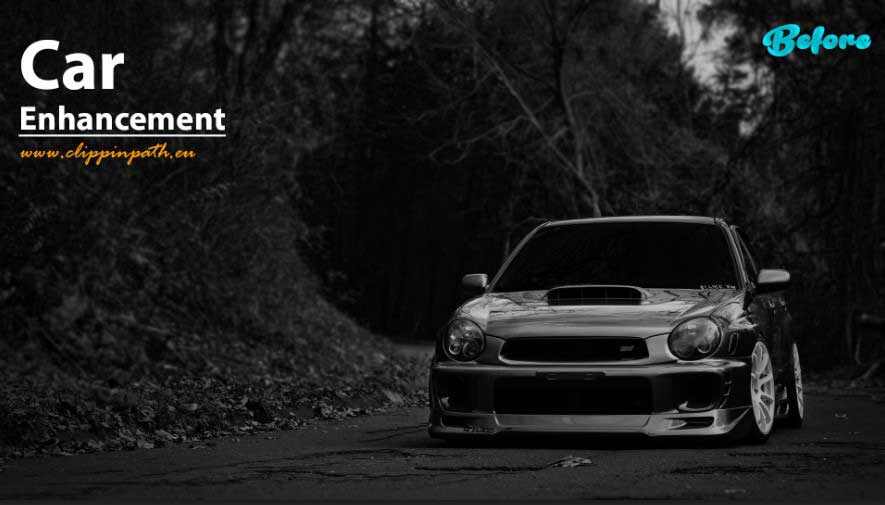
After effect-
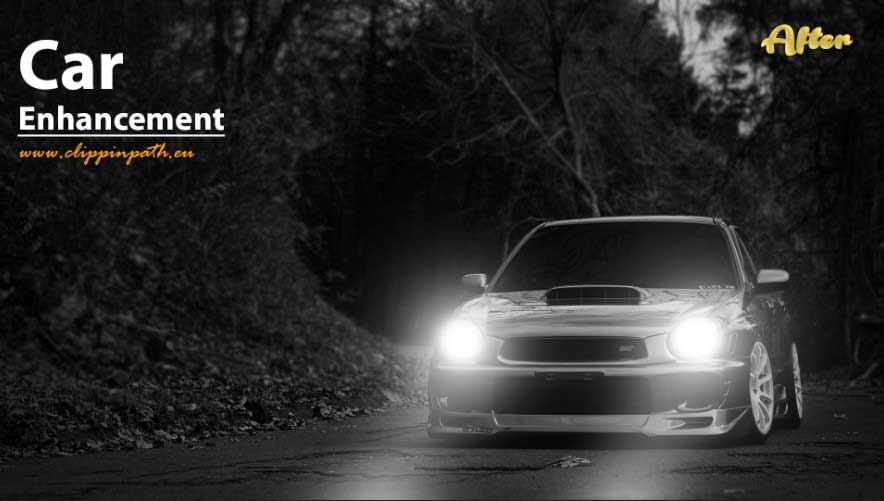
Image 2:
Clipping Path EU– is the best service provider of image editing sector. Car image editing and enhancement service is more need able to the Car dealer and Car sellers. We are able to do all kinds of Car image editing services.
So, take a Free Trial and check our service quality and efforts. Thanks.
Check out- Make an amazing car with scaling in Photoshop | Car enhancements


