
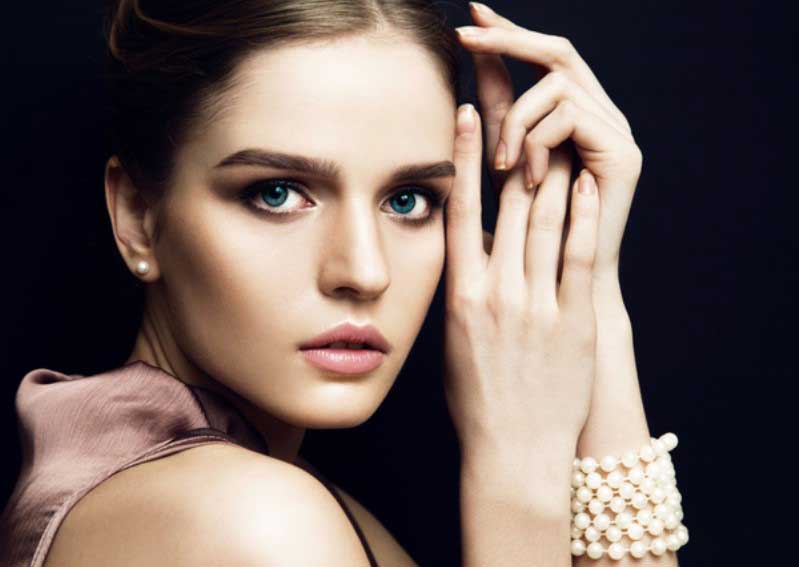
In this instructional exercise, I demonstrate to you generally accepted methods to change eye shading in Photoshop utilizing a Hue/Saturation modification layer! Regardless of whether you know which eye shading you need or you simply need to play around and analyze. A Hue/Saturation modification layer influences changing eye to shading simple, quick and fun! Furthermore, in light of the fact that we’ll be working with a modification layer, we won’t roll out any perpetual improvements to the picture. Despite everything you’ll have your unique, unedited adaptation, with the first eye shading, even after we’re finished. Clipping Path EU– always stand for providing quality service and express amazing tutorial on image editing.
I’ll be utilizing Photoshop CC, however, the means are completely good with Photoshop CS6. To take after along, you can utilize any picture where you need to change the individual’s eye shading.
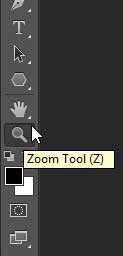
Stage 1: Zoom In On the Eyes
Before we start, how about we make it less demanding to perceive what we’re doing by zooming in on the eyes. Select the Zoom Tool from the Toolbar:
Snap a couple of times on the region between the eyes to zoom in on the two eyes without a moment’s delay. To focus the eyes on your screen after you’ve zoomed in, press the H key on your console to change to Photoshop’s Hand Tool, and after that snap and drag the picture into position.
Stage 2: Select the Lasso Tool
To change the eye shading without influencing whatever is left of the picture, we first need to draw a determination around the eyes. Select the Lasso Tool from the Toolbar.
Stage 3: Draw a Selection around the Eyes
Draw a choice around one of the eyes. We needn’t bother with the whole eye, only the iris (the hue region) in the middle. Try not to stress if your choice blueprint isn’t great. We’ll tidy things up later:
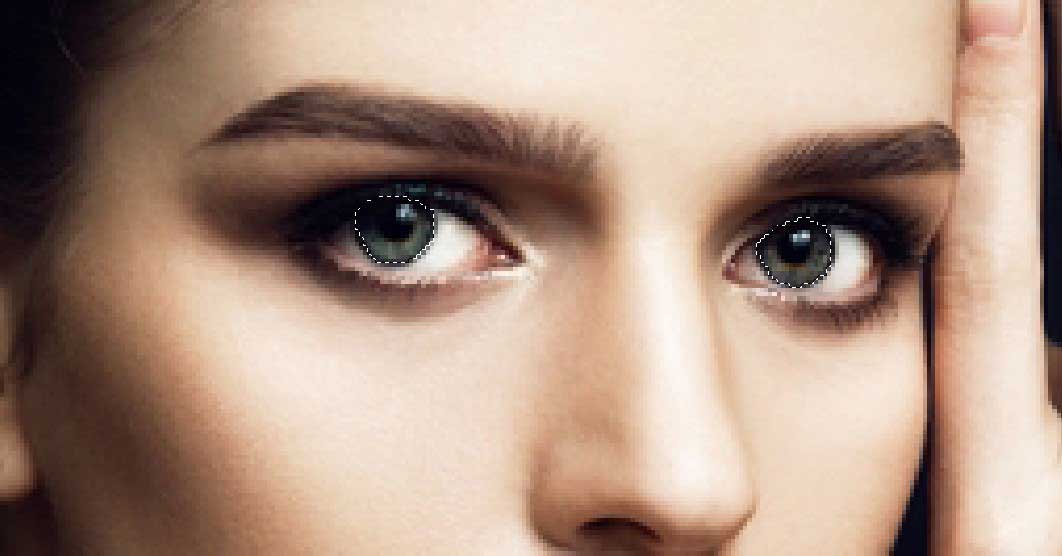
With the principal eye chose, press and hold your Shift key. A little in addition to signing ( + ) shows up in the lower right of your Lasso Tool cursor. Holding the Shift key advises Photoshop to add the choice you’re going to attract to the determination you’ve officially drawn. Draw a choice around the second eye. The two eyes should now be chosen:
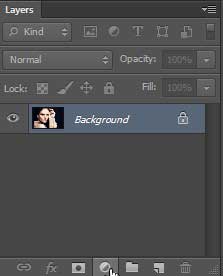
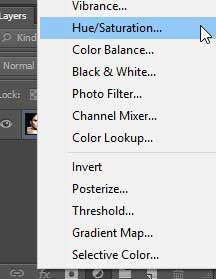
Stage 4: Add a Hue/Saturation Adjustment Layer
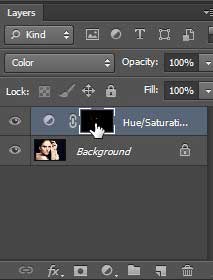
To change the eye shading, we’ll utilize a Hue/Saturation alteration layer. In the Layers board, tap the New Fill or Adjustment Layer symbol.
Stage 5: Select the “Colorize” Option
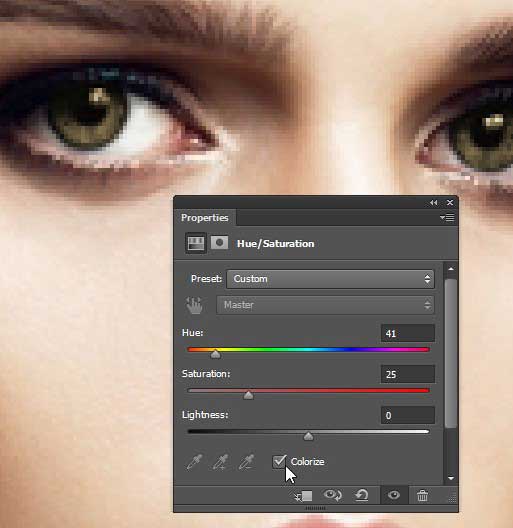
The controls and choices for the Hue/Saturation alteration layer show up in Photoshop’s Properties board. Turn on the Colorize choice by clicking inside its checkbox.
When you select Colorize, the individual’s eyes will turn red. Red is most likely not the shading you’re going for, so we’ll figure out how to transform it next.
Stage 6: Choose a New Eye Color with the Hue Slider
To pick alternate shading for the eyes, drag the Hue slider. “Tint” is the thing that the vast majority of us consider as the real shading itself, and dragging the slider from left to right goes you through every one of the shades of the rainbow, moving from red on the far left to oranges and yellows, greens, blues, maroons, et cetera, the distance back to red on the far right. You’ll see the eye shading changing in the picture as you drag the slider. I’ll set my Hue an incentive to around 200 for a pleasant blue, obviously, you can pick whichever shading you require:
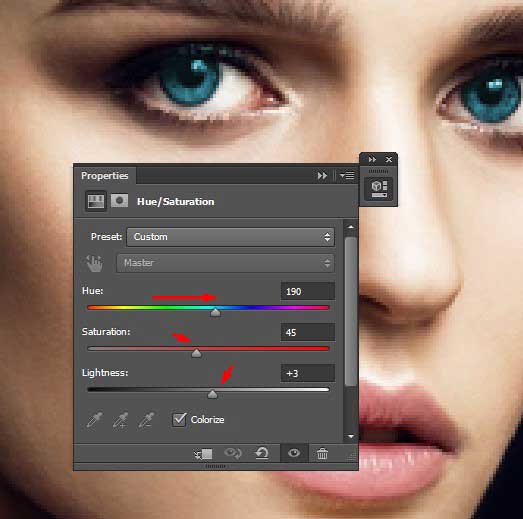
Stage 7: Lower the Saturation of the New Color
Once you’ve picked eye shading with the Hue slider, drag the Saturation slider to one side to bring down the power until the point when the shading looks more normal. A Saturation estimation of in the vicinity of 10 and 15 as a rule functions admirably:
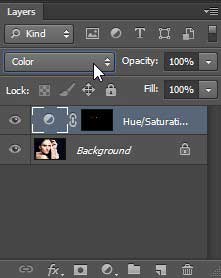
Stage 8: Change the Blend Mode To Color
In the Layers board, the Hue/Saturation alteration layer sits over the picture on the Background layer. Right now, the modification layer’s mix mode is set to Normal, which implies that it’s influencing the shade of the eyes as well as their brilliance. To change just the shading, change the mixed mode from Normal to Color.
The distinction can be unpretentious, yet you should see a greater amount of the first detail in the eyes in the wake of changing to the Color mix mode. For my situation, the eyes now show up somewhat brighter than they did with the mixed mode set to Normal.
Stage 9: Select the Layer Mask
An extraordinary element of modification layers in Photoshop is that they incorporate an implicit layer cover and whether we’ve known it or not, we’ve been utilizing the layer veil as far back as we included the Hue/Saturation change layer. Photoshop utilized our underlying Lasso Tool choice to make the cover for us, and we can see the layer veil thumbnail in the Layers board.
Notice that the thumbnail is filled for the most part with dark, with just two modest regions of white. Dark speaks to the regions where the Hue/Saturation modification layer is having no impact on the picture. As such, those regions are as yet demonstrating their unique shading. The two little white regions are the determinations we made around the eyes with the Lasso Tool. Those are the main zones in the picture that are being colonized by the modification layer.
Notice likewise that the thumbnail has a white feature outskirt around it. The fringe reveals to us that the layer cover is right now chosen. In case you’re not seeing the fringe around the thumbnail, tap on the thumbnail to choose the cover:
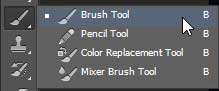
Stage 10: Select the Brush Tool
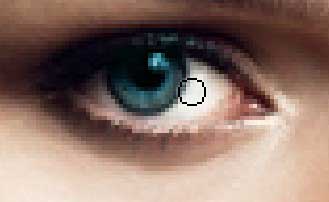
In the event that you’re underlying Lasso Tool choice wasn’t impeccable (mine unquestionably wasn’t), a portion of your new shading likely reaches out into the white parts of the eyes, and possibly into the eyelids also. On the off chance that we take a gander at one of the eyes in my photograph, we see a portion of the blue around the edges of the iris reaching out into the white territories and a tad into the eyelids:
Stage 11: Set Your Foreground Color to Black
To conceal the shading from around the iris, we have to paint with dark. Photoshop utilizes our Foreground shading as the brush shading, and we can see our present Foreground and Background hues in the shading swatches close to the base of the Toolbar. Press the letter D on your console to reset the Foreground and Background hues to their defaults. This will set your Foreground shading to white and the Background shading to dark:
![]()
Stage 12: Paint around the Iris in Each Eye
Paint around the iris in each eye to tidy up any issue regions. For best outcomes, utilize a little, delicate edge brush. You can modify the span of your brush from the console by squeezing the left section key ([ ) over and over to make the brush littler or the correct section key ( ]) to make it bigger. To change the hardness of the brush, press and hold Shift while squeezing the left section key to make the brush edges gentler. Holding Shift while squeezing the correct section key will make the edges harder.
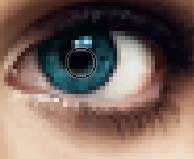
Since we’re painting on a layered cover, not specifically on the picture itself, we don’t see our brush shading as we paint. Rather, the new eye shading vanishes from the regions we’ve painted over:
We additionally don’t need the shading to show up inside the understudy (the dull focal point of the eye), so resize your brush if necessary and paint inside the student with dark to expel the shading from that territory. Once you’re finished with the primary eye, move over the other eye and tidy it up also:
Settling Mistakes
On the off chance that you commit an error and inadvertently paint away a portion of the shading in the iris, press the letter X on your console to swap your Foreground and Background hues. This will set your Foreground shading to white. Paint with white over the territory to reestablish the shading. At that point, squeeze X again to set your Foreground shading back to a dark and keep painting.
To contrast, your new eye shading and the first shading, turn the Hue/Saturation change layer off by clicking its deceivability symbol in the Layers board.
Read more: Tips for whitening your Teeth in Photoshop


