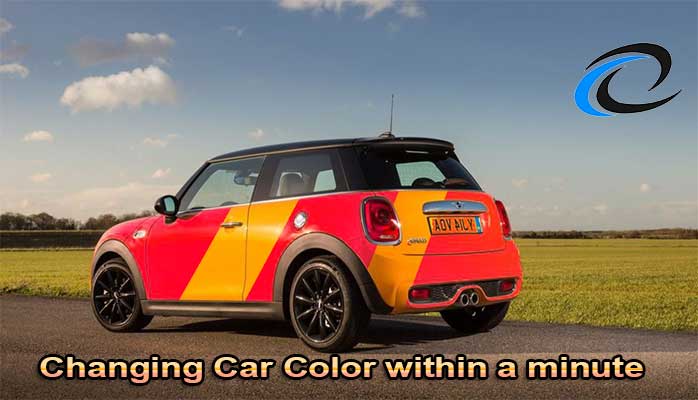
How to change Car color in Photoshop?
Color correction is a necessary editing part of image editing services. Applying this service we can change car color our product color alternatively and add our choose the able color to our particular products.
Car or Automobile is a regular need of our life and we want to buy our car as our choice able color or colorful choose. Sometimes we apply many Car image editing services including Color Correction Service for this purposes. So if you are able to change or adding our choice able color in our demanding Car then it will be amazing, right? Now we are going to learn like this amazing tips and hope you will enjoy it. This tutorial is provided by- “Clipping Path EU“.
Photoshop is an incredibly adaptable instrument, which can be exceptionally helpful for any number of little undertakings we run over all the time. Envision working at a showcasing firm, where you are requested to advance an item by promoting it with an auto.
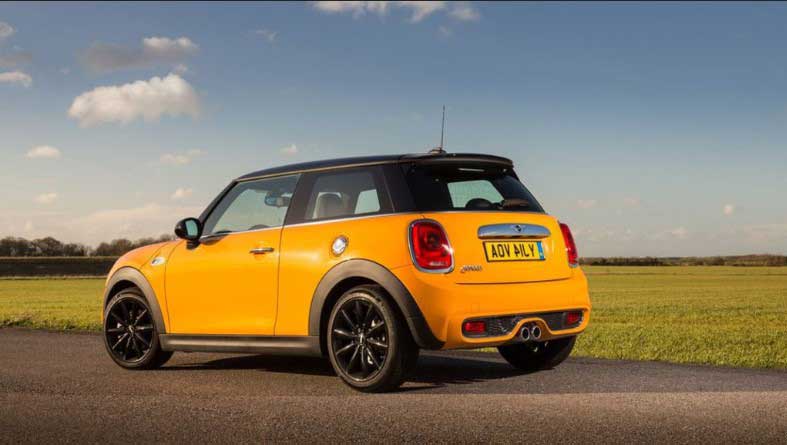
As a matter of first importance, you would need to think of crusade thoughts, and afterward draw out your procedure, lastly, you have it made sense if – you need to work with a green-painted toy auto to advance befouls.
Issues may emerge when you understand that there is auto paint shading that matches the thought you have as a primary concern. You may think about whether you have to make a rendering of an auto in programming like 3ds Max with a specific end goal to get your hands on the picture you require, however delivering a photorealistic result clearly takes a lot of time, also abilities.
Luckily for us, Photoshop acts the hero with a procedure that exclusive takes a few minutes to finish and delivers phenomenal outcomes. How about we figure out how to change the shade of an auto by utilizing Photoshop’s local instruments.
Choosing tonal range
In the wake of opening your picture in Photoshop, it’s a great opportunity to make the determinations required for changing the tint of your toy auto – yet how it should be possible without influencing different components?
In the event that you are considering utilizing the Quick Selection apparatus, let me first reveal to you that in addition to the fact that you are probably going to squander a mess of time by choosing each and every detail of the auto, however, you are additionally far-fetched to wind up with a reasonable outcome.
The edges of the determination will be uncertain, implying that the last outcome can look a little as if we painted it physically with the brush instrument… or more awful.
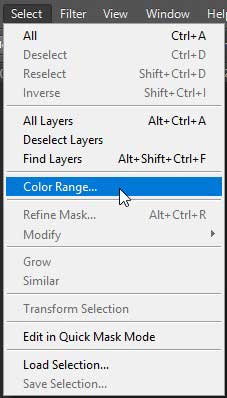
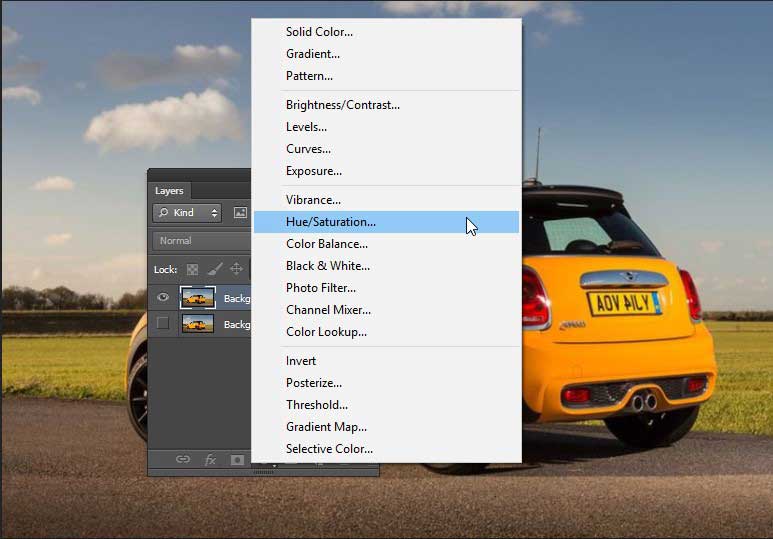
- How about we utilize a more dependable technique, to be specific Color Range. Go to the Select menu and tap on ‘Color Range‘, and another exchange box will show up.
- Tap on the base shade of your auto to test it inside the determination review, and afterward hold down the Shift scratch while you test the various shades of shading present on the auto’s paint.
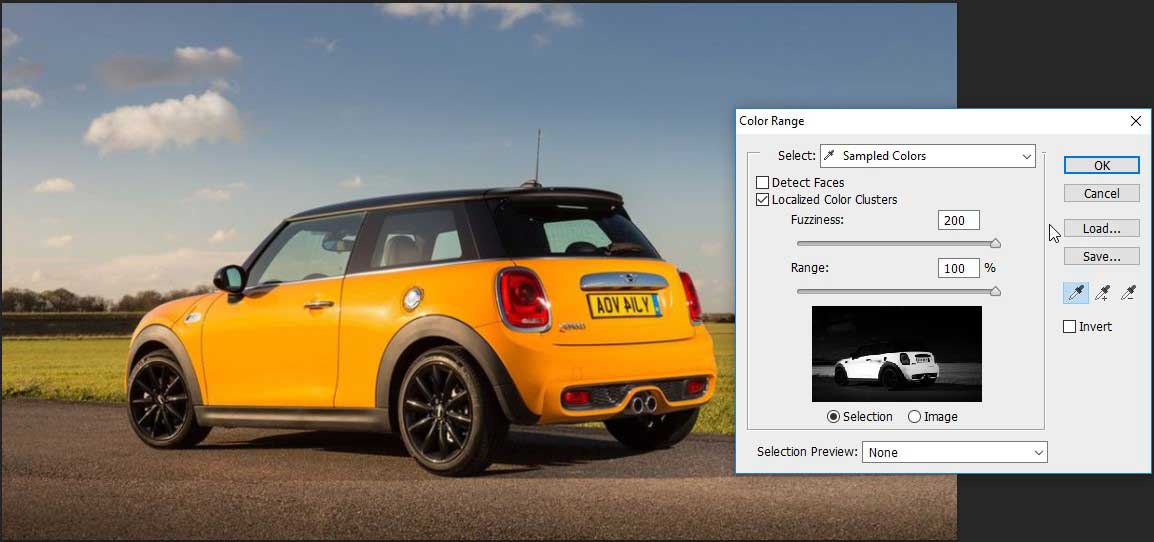
Actuate the ‘Limited Color Clusters’ choice so as to have stricter control over the chose shade test, and you can likewise utilize Fuzziness to grow or decrease the example measure. Acknowledge the determination made.
- Photoshop will now show they chose regions characterized by the Color Range apparatus.

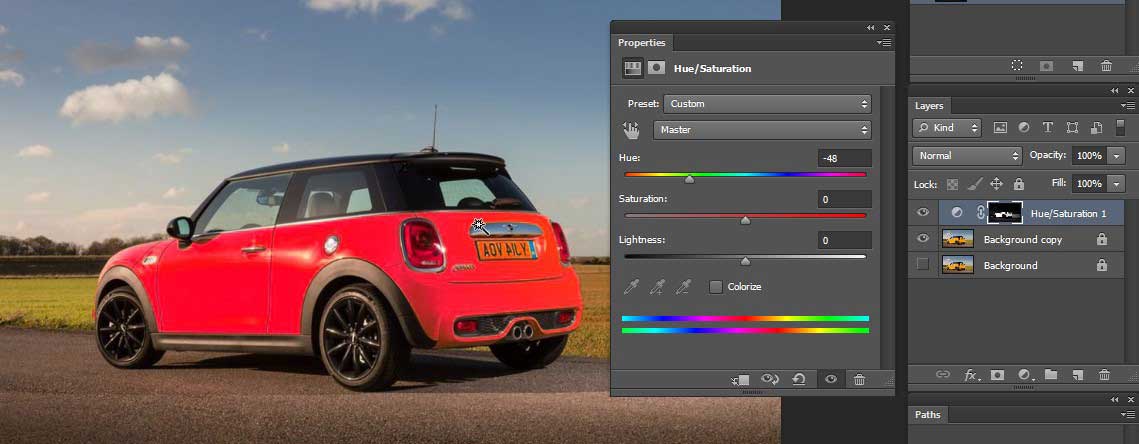
- Tap on the Adjustment Layer catch and make a Hue/Saturation layer keeping in mind the end goal to change the shade of the auto.
- Select the Colorize box and work with Hue and Saturation sliders until the point when you are satisfied with the outcomes.
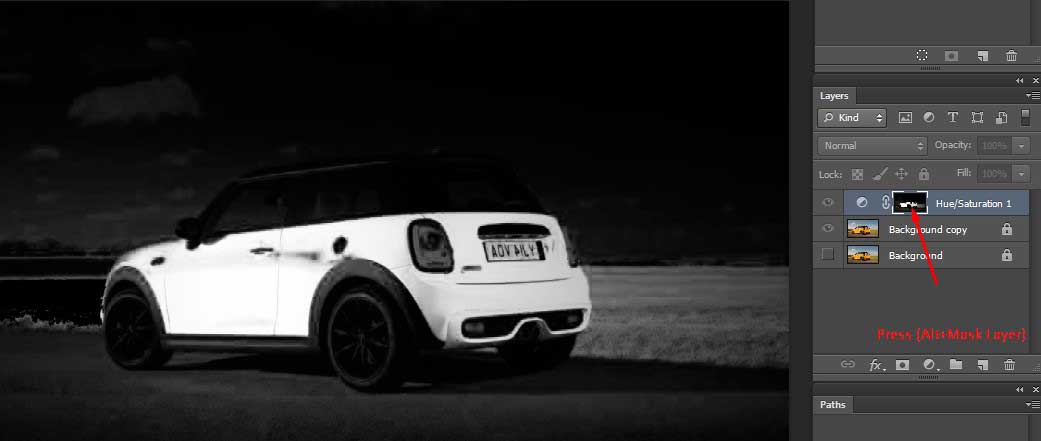
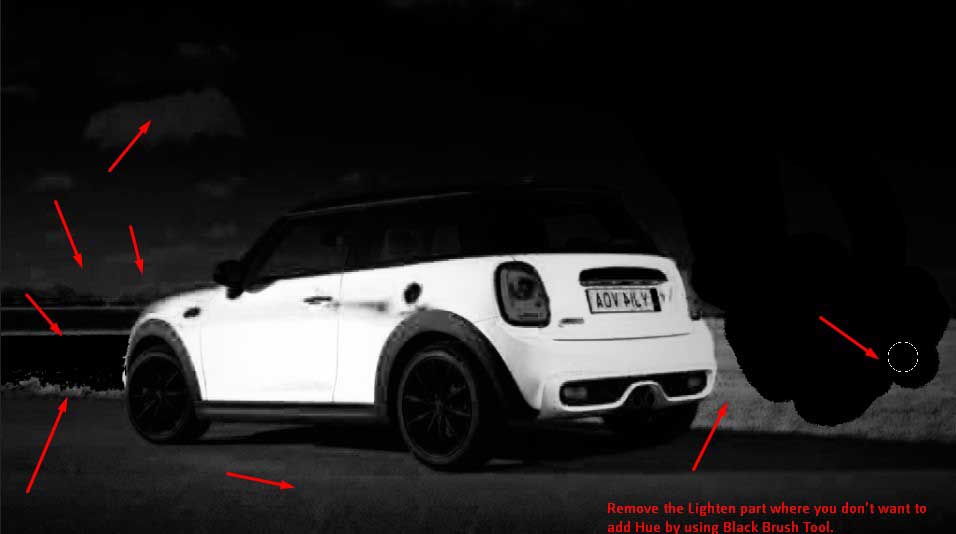
- Refine the choice by (Alt)-clicking inside the cover made with the Color Range device and after that utilization a dark brush to paint any zones where you would prefer not to change shades.
- Contemplations while applying shading change

There are many imaginative conceivable outcomes when utilizing this strategy since it is influenced by:
- Hue chose
- Saturation chose
- Opacity of the layer
- Opacity of the apparatus utilized for painting (progressed)
- Further choices (progressed)
> Use black brush tool for removing lighten area of the mask layer-
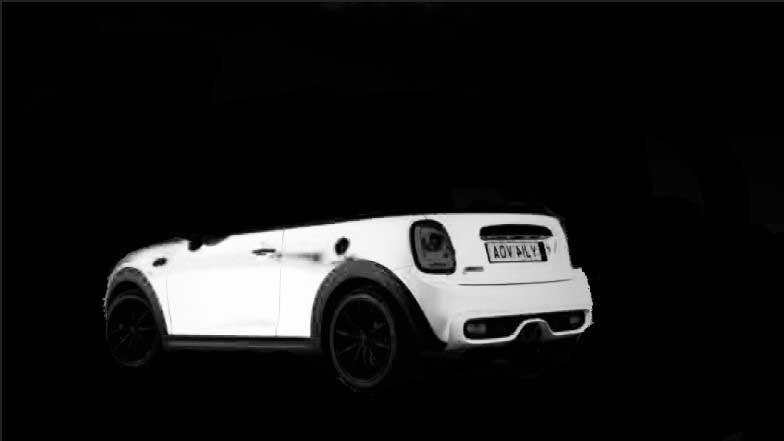
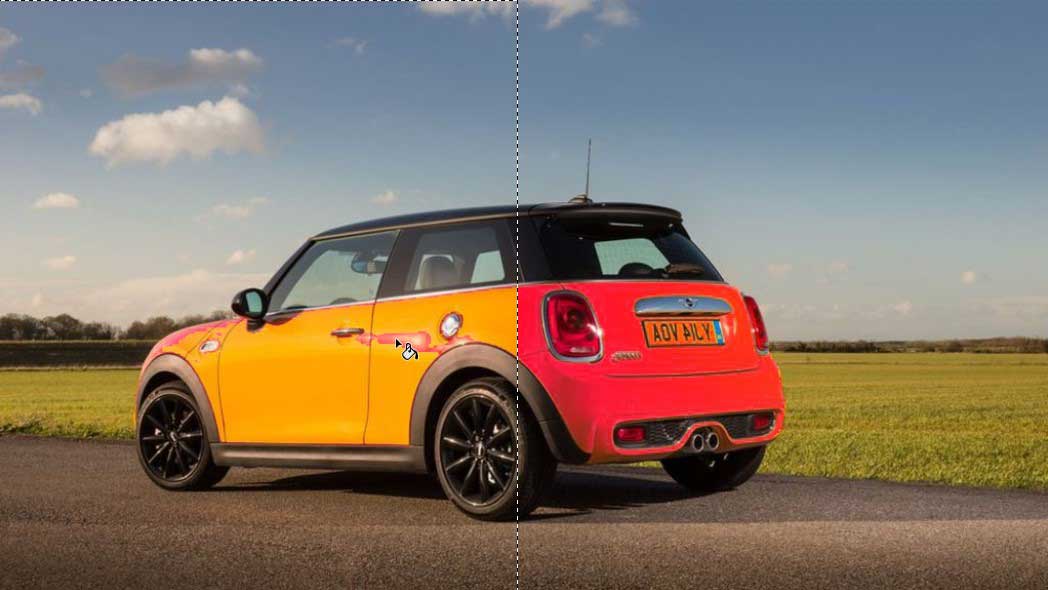
- Remove the lighten area like that-
- After finish, this would look like that-
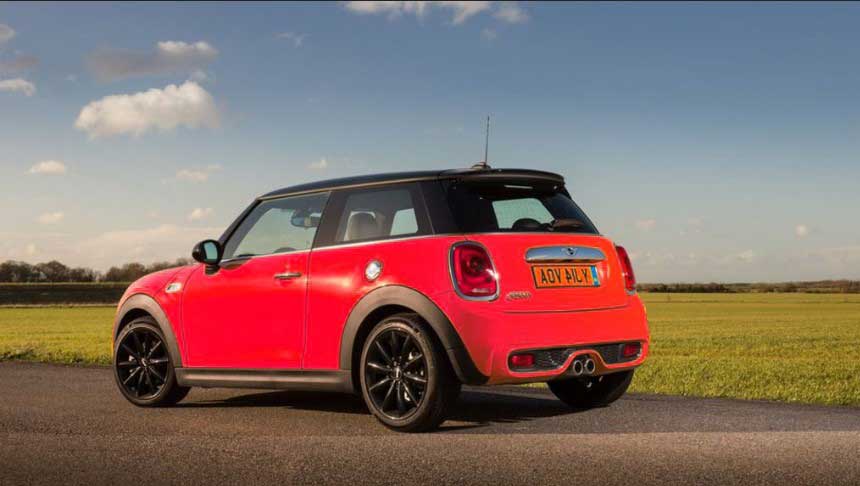
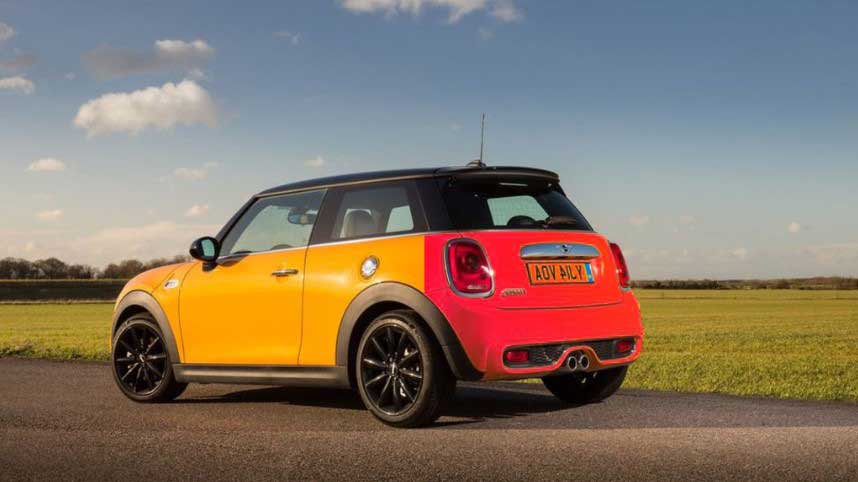
- This is the final color-changing image-
What I mean by the last two components is that you can rapidly play out a choice with the marquee device and paint the chose zone with the dark so as to make a Before/After view on the photo you are taking a shot at.
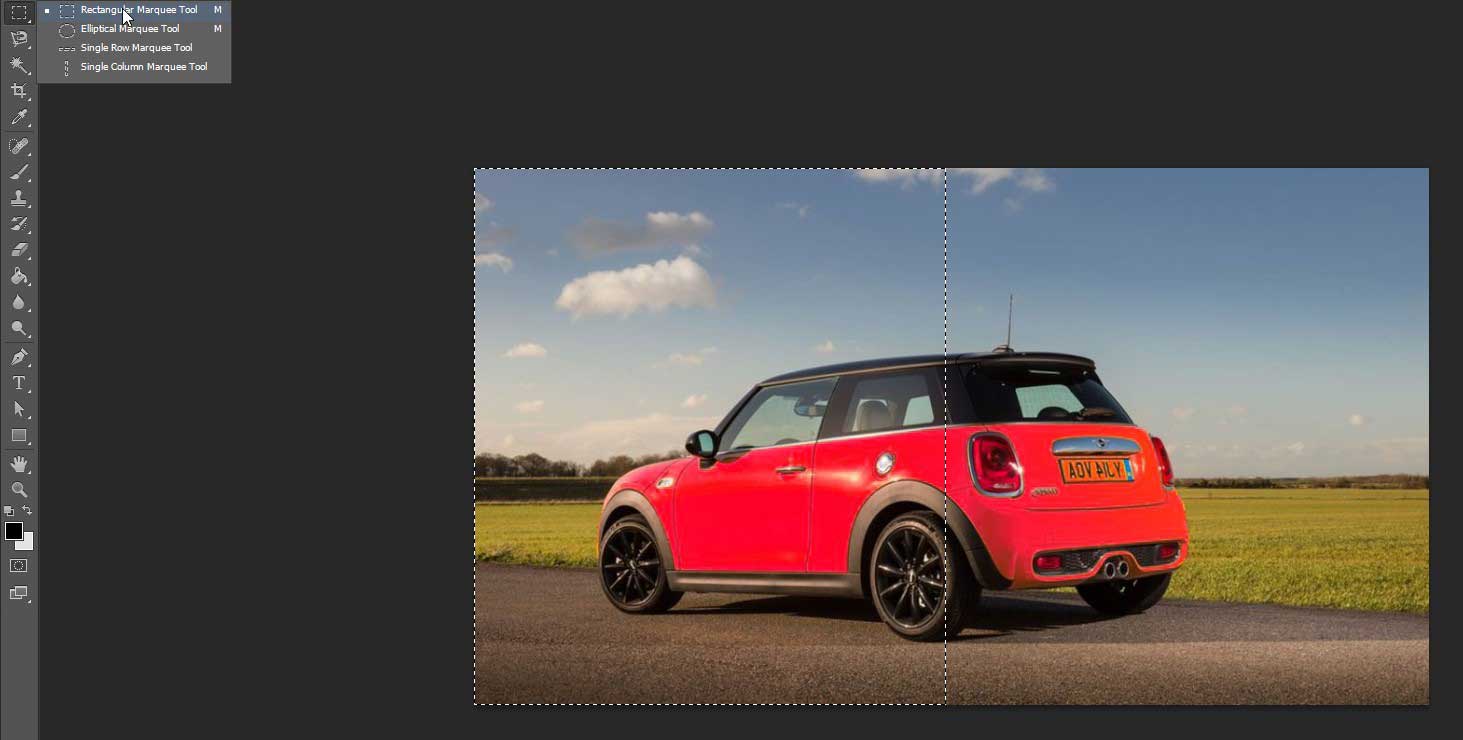
You could likewise utilize the Polygonal Lasso and make determinations at irregular zones where you could do precisely the same.
This can deliver a ton of inventive impacts that will enhance the nature of our work, on the off chance that we utilize propelled highlights, for example, the pen apparatus for all the more all around made determinations.
- Use Paintbucket Tool-
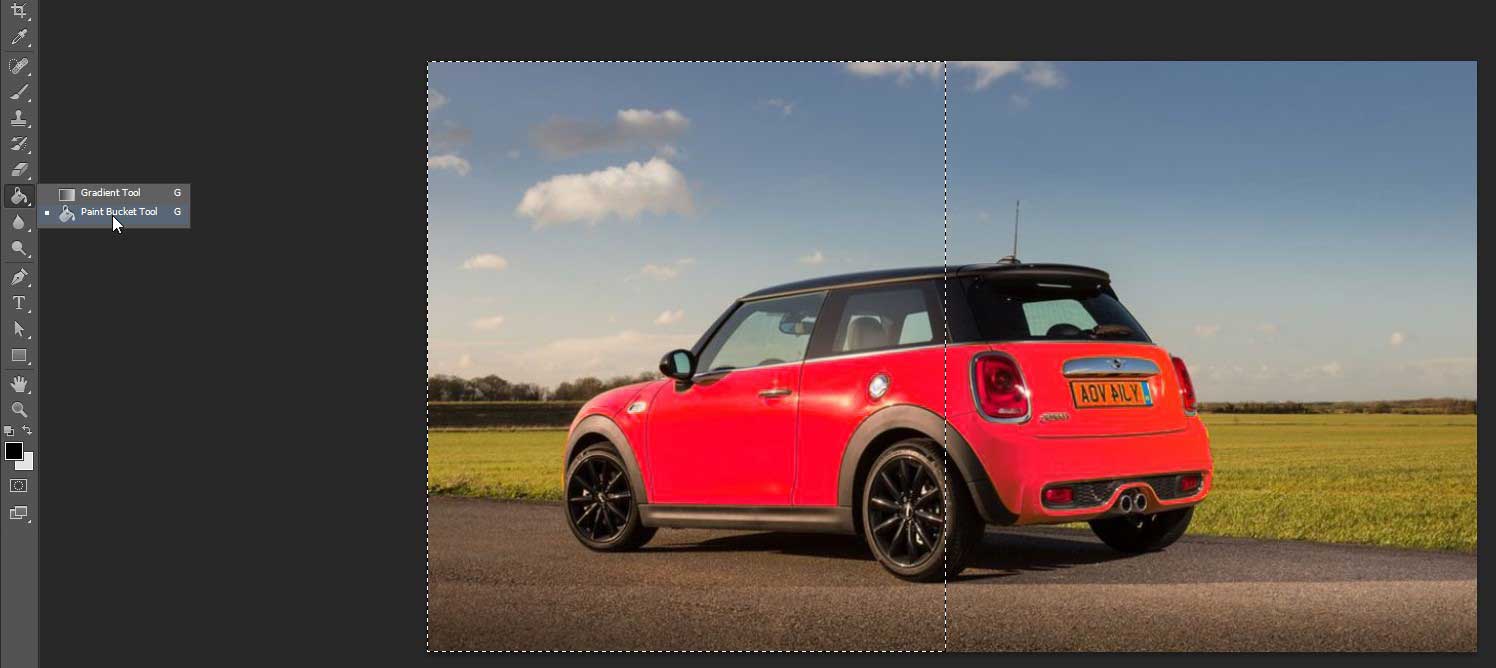
Follow that– Applying Paintbucket Tool.
Keep a nearby take a gander at the Opacity of the Bucket apparatus or Brush instrument preceding painting those determinations in dark or some other shading since esteem lower than 100% will enable the piece of the first tone to radiate through the Adjustment layer.
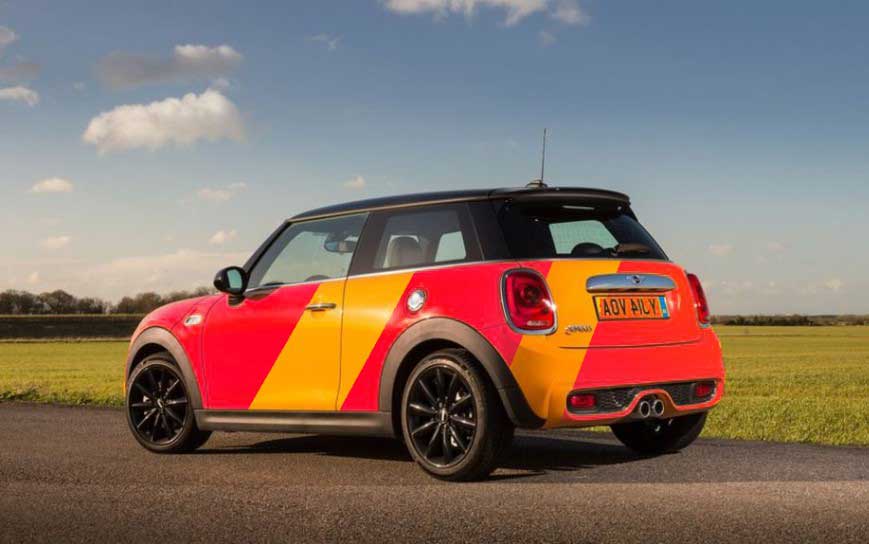
- This is the Before and After Effect photo-
- You can also make this effect also-
Hope you enjoy it. Get connected with us for new tutorials.
Video tutorial:
Next post:- How to thicken hair naturally in Photoshop?


