How to change Hair color in Photoshop Cs6?
Hi, this is an awesome tutorial for changing the color (How to change hair color) of your hair in quick and easily solved.
In this instructional exercise, we’ll demonstrate to you proper methodologies to change the shade of hair in Adobe Photoshop CS6. There is a wide range of approaches to change hair shading and we investigate only one of the systems that give the most solid and reliable shading changes. The method can likewise be connected to different protests and utilized for a large number of purposes. In case you’re hoping to change eye shading at that point observe our eye shading instructional exercise. Clipping Path EU– is a specialist of image editing and they provide all kinds of image editing services.
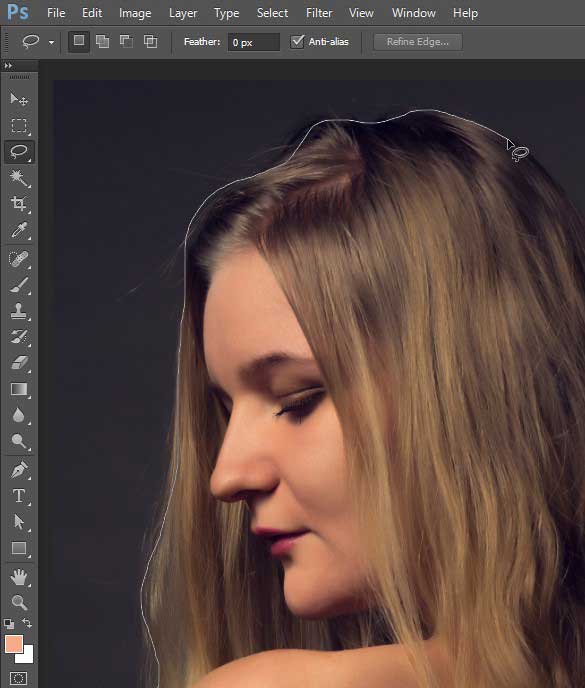
1 Hair selection:
selection tool:
Hold down the enchantment wand instrument and a fly up will show up with options, select the speedy determination apparatus from here.
Utilizing the Lasso Selection Tool, snap and drag over the hair – don’t stress over being excessively exact as of now, tidying up comes later. Simply ensure that its lion’s share is chosen.
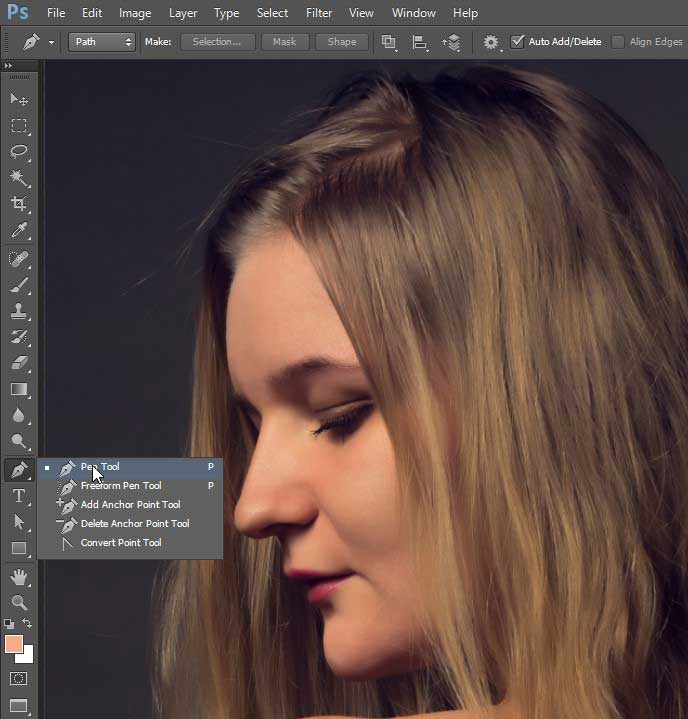
Pen Tool: If you want to accurate selection then use the pen tool and drag the hair area. See the photo for your clear concept-
TIP:
Hold down Alt while dragging to unselect any zones you would prefer not to incorporate.
2 Using The Refine Edge Tool

The most effective method to get to the Refine Edge Tool
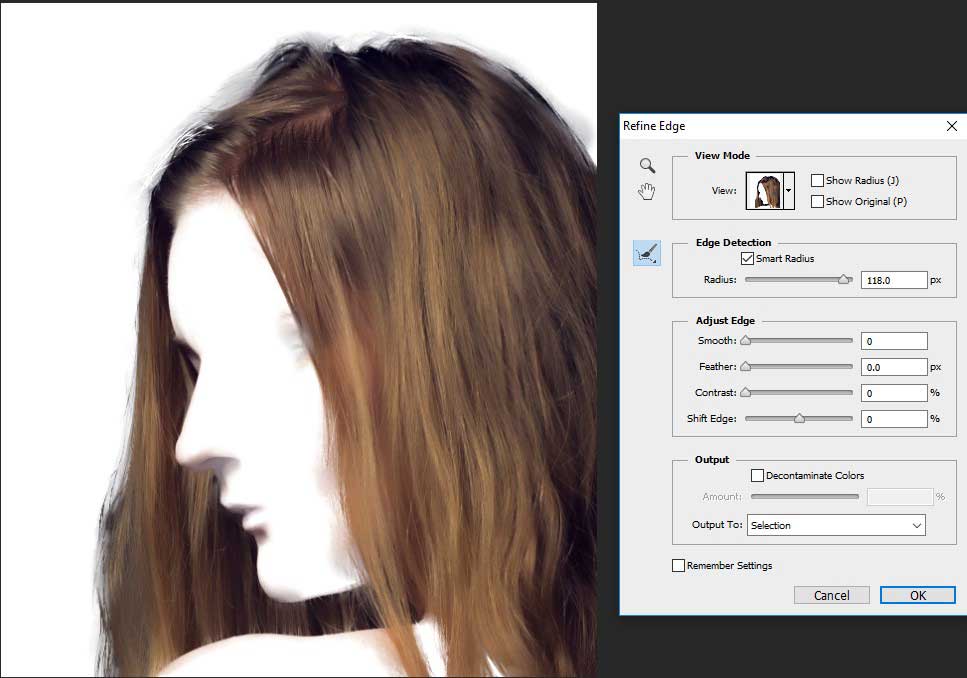
When you have any of the determination instruments chose (counting the brisk choice apparatus) at that point along the best menu you will see the Refine Edge catch. Snap this.
Another exchange box will open and an assortment of choices are currently accessible that will enable us to tidy up the determination.
Brilliant Radius – This esteem enables you to build the fringe of the determination for fine points of interest like hair and so on while not choosing more extensive zones like the foundation. Modify the range to suit your picture (bigger pictures which have more pixels have a tendency to require a higher span).
The brush instrument ought to be naturally chosen inside the Refine Edge discourse box. Snap and drag over the edges of the hair to permit Photoshop to create a superior determination of the edges which are more common.
Now you can begin being as exact as required. It’s conceivable to backpedal and re-try the refine determination the same number of times as expected to get the exactness required.
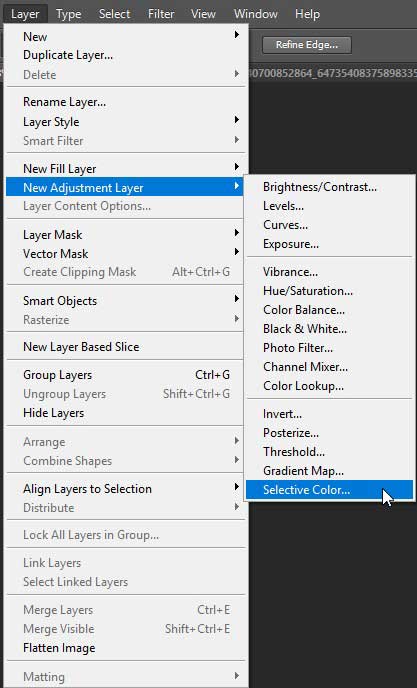
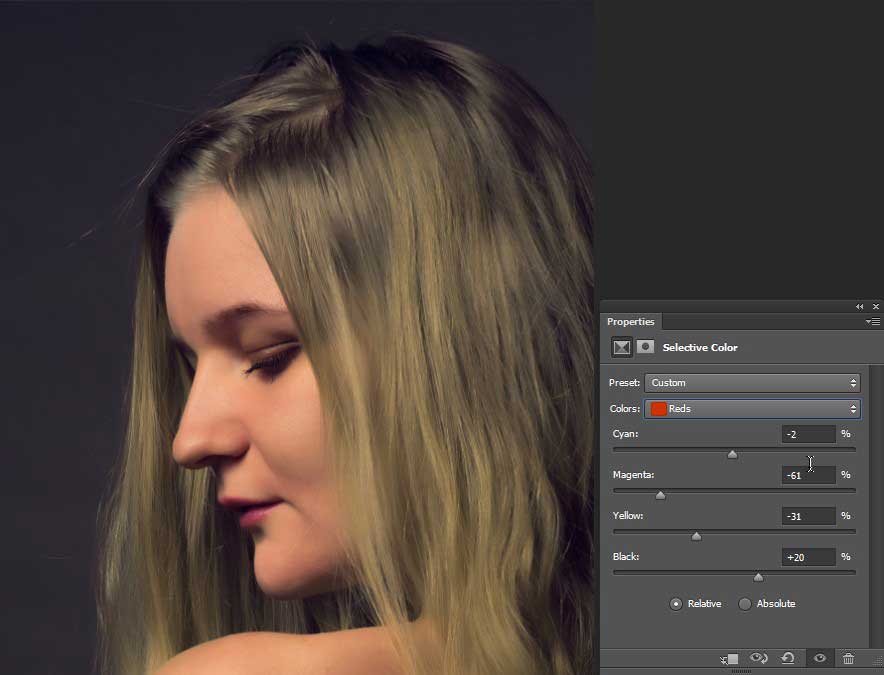
3 Layer Adjustments – Selective Color

- Specific Color is the procedure that will enable us to control the current hues.
- Step by step instructions to make the Selective Color change layer.
- Under Layer-New Adjustment Layer, Selective Color can be found at the base.
3 A touch of Color Theory – Neutrals and Blacks
With the end goal of this instructional exercise, I might allude to the neutrals and blacks. Neutrals can be viewed as the mid tones and dark the darker tones (or shadows).
Right off the bat, we will control the nonpartisan tones. You ought to have the accompanying accessible:
- Cyan
- Magenta
- Yellow
- Blacks
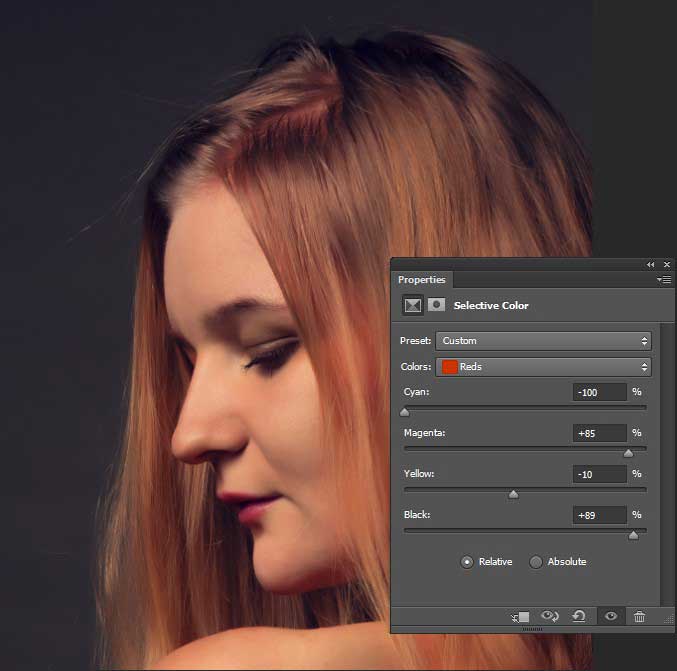
Red Hair
By diminishing cyan, you will expel the blue tints from the choice which will build the red shades in the choice. At the point when joined with expanding maroon and yellow the yield will be a solid red done snap OK. (With the end goal of this showing I have kept the determination genuinely free).
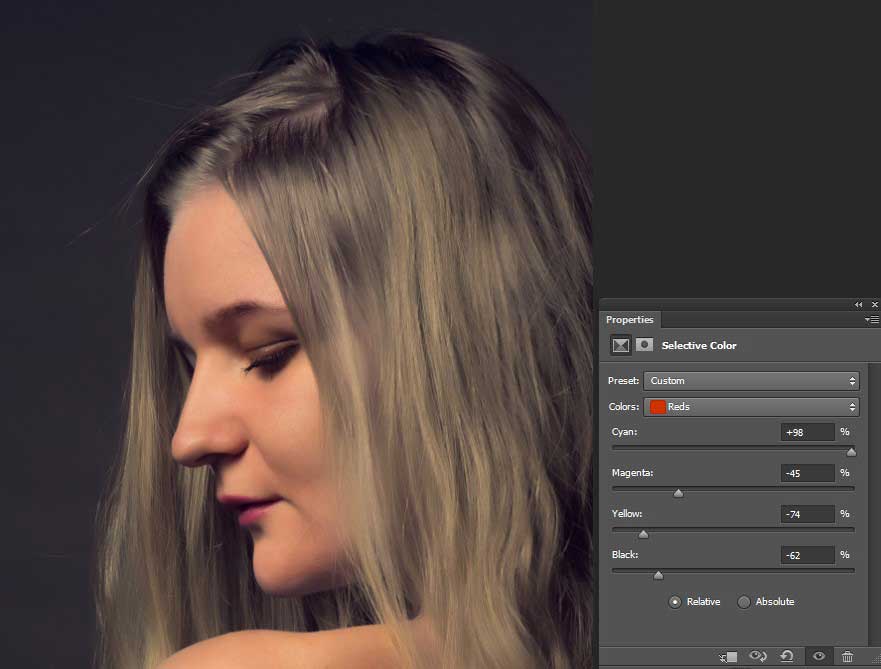
Turquoise Hair
By expanding the cyan you will build the blue shades in the choice and when the fuchsia is diminished further (to haul out the blues) and the yellow expanded (which will bring out more green) at that point you’ll wind up with a more grounded shading that can be considered relatively doubtful. To tame the liveliness down we can help the mid-tones marginally by diminishing the blacks.
Slide Green Hair
Utilizing the Turquoise Tutorial as a base I now change from Neutrals under “Shading” in the alterations board to Blacks. By diminishing the cyan you will expand the red tones in the shadows which ought to draw out browner shading. A slight increment in fuchsia will enhance the darker. At that point, by pushing the yellow up we’ll be drawing out the more grounded greens in-between the hair strands. To give it more profundity we’ll build the blacks so its level with the yellow.
Subtle elements:
As should be obvious beneath, the hues cover specifically puts like on the skin, top and so on. To amend these territories we would need to reload the choice, transform it and utilizing a delicate 30% haziness brush, shading back in a portion of the skin shading to diminish the overabundance tinge. A point by point clarification will be canvassed in a future instructional exercise.
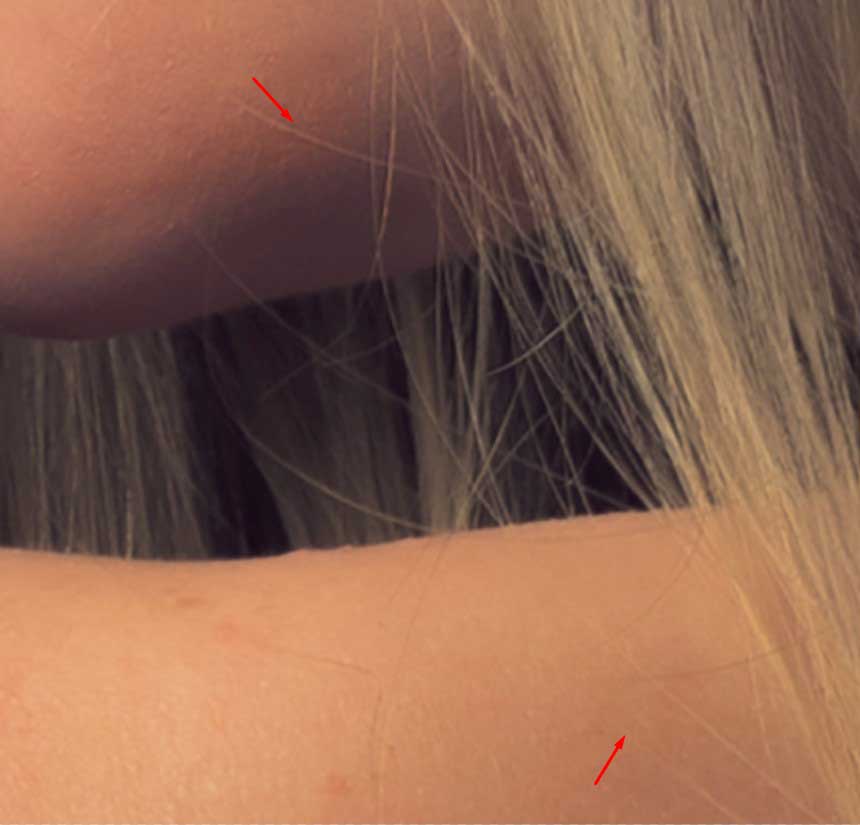
Note – Hair shading will reflect off the skin so don’t take the greater part of the new shading without end. Simply diminish it.
Learn more: Product photo retouching services …


