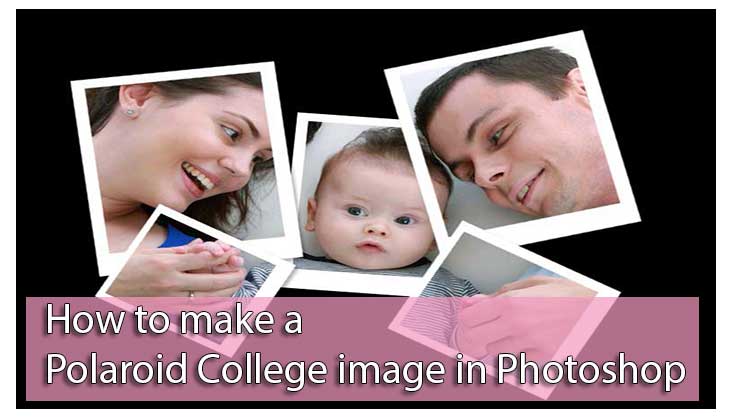
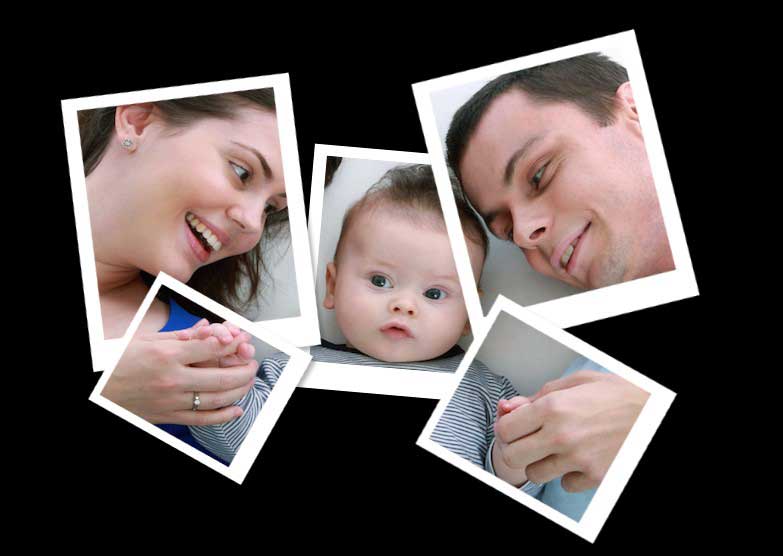
How to make a Polaroid College image in Photoshop
In this Photoshop Effects instructional exercise, we’ll figure out how to take a solitary photo and transform it into a composition of Polaroid’s with adding frames.
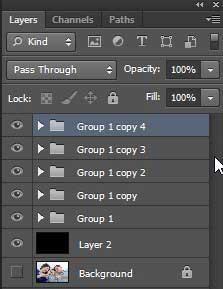
You can utilize this impact with bunches of various sorts of pictures, regardless of whether it’s a photograph of one individual or a few people. It’s incredible for photographs of family or companions, get-away photographs, or even as an inventive impact for wedding photography. This is a simple photograph collection impact to make and as we’ll see later in the instructional exercise. A significant part of the work is just rehashing a similar couple of ventures again and again until you’re content with the outcomes.
I used Photoshop CS6 for doing this awesome effect.
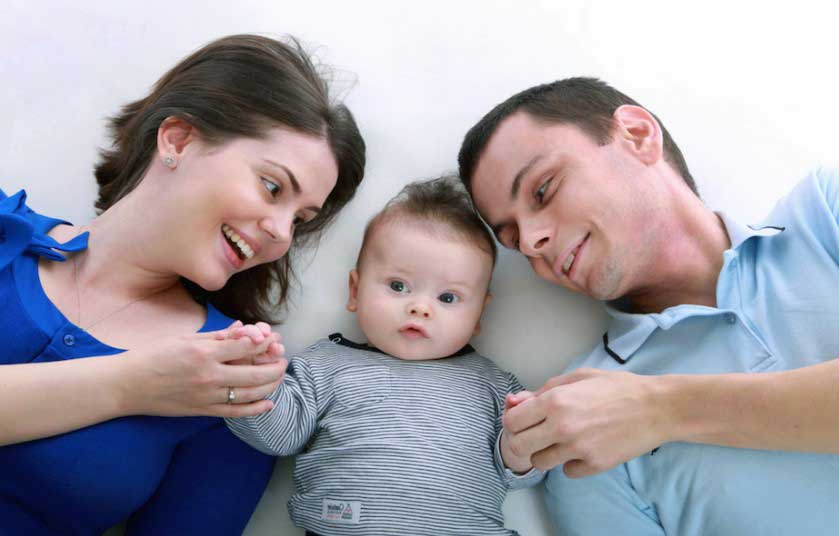
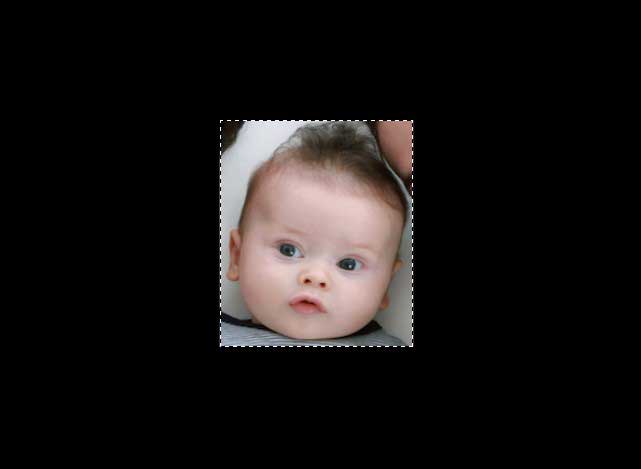
This is the after effect image-
First: Duplicate the Background Layer
The main thing we have to improve the situation this impact is copying our Background layer. With our picture open in Photoshop, we can find in the Layers palette that we at present have only one layer. It’s called the Background layer, which contains our unique picture.
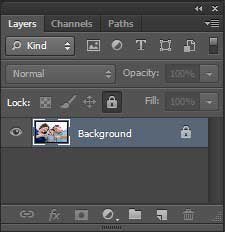
To rapidly copy the layer, utilize the console alternate route Ctrl+J (Win)/Command+J (Mac). Photoshop makes a duplicate of the Background layer named it Layer 1.
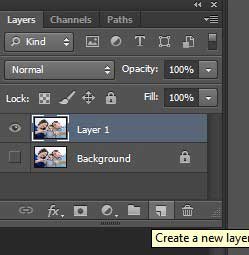
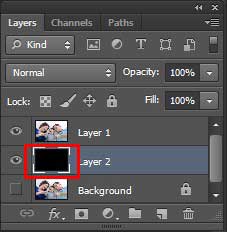
Second: Add A New Blank Layer Between The Two Layers
Next, we have to include another clear layer between our Background layer and its duplicate that we just made. The duplicate is chosen in the Layers palette (we can tell the layer is chosen since it’s featured in blue). Regularly when we include another layer, Photoshop places the new layer over the layer that is as of now chose, yet we need our new layer beneath “Layer 1”, not above it. Keep the Layer 1 in the above all layers.
Photoshop includes another clear layer named “Layer 2” between “Layer 1” and the first Background layer.
Third: Fill the New Layer with Black
We will utilize dark as the foundation for our impact, so how about we reset our Foreground and Background hues if necessary by squeezing D on your console. This sets dark as your Foreground shading and white as your Background shading. As should be obvious in the Foreground and Background shading swatches close to the base of the Tools palette.
Press “D” to reset Photoshop’s Foreground and Background hues to high contrast if necessary.
Presently with dark as our Foreground shading and the new clear layer chose in the Layers palette, we should fill the new layer with dark utilizing the console alternate way (Alt + Backspace) (Win)/Option + Delete (Mac). Nothing will seem to have happened to the picture itself and that is on account of “Layer 1”. Which contains a duplicate of our unique picture, is blocking “Layer 2” from seeing? In any case, on the off chance that we take a gander at Layer 2’s thumbnail in the Layers palette, we can see that we’ve filled the layer with dark:
Layer 2’s thumbnail in the Layers palette now demonstrates that the layer is loaded with dark, despite the fact that we can’t see it yet in the picture itself.
Fourth: Add a New Blank Layer
With “Layer 2” (the layer we simply loaded with dark) chose, click by and by on the New Layer symbol at the base of the Layers palette.
Include another clear layer.
Photoshop will include another clear layer between the dark filled layer and the duplicate of the first picture above it:
The new clear layer is included between “Layer 1” and “Layer 2”.
Fifth: Drag Out a Rectangular Selection as the Inside of Your First Polaroid
Select the Rectangular Marquee Tool either from the Tools palette or by squeezing M on your console.
Select the Rectangular Marquee Tool.
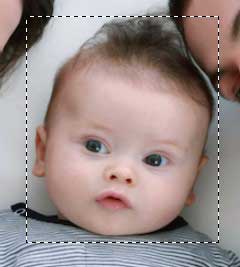
At that point, with the Rectangular Marquee Tool chose, drag out a determination inside your picture which will end up being within the primary Polaroid (the part which contains the photograph). I will drag my determination around the endearing faces. It doesn’t generally make a difference where you influence this choice since you’ll to have the capacity to move it anyplace you like later. Drag out a determination in the state of within a Polaroid photograph.
Six: Fill the Selection with Black
We have to fill the choice with dark now. In fact, it doesn’t make a difference which shading we fill the determination with, however, to keep things basic and since dark is as of now our Foreground shading, we should utilize dark. Ensure you have the new clear layer chose in the Layers palette, and afterward utilize the console easy route Alt + Backspace (Win)/Option + Delete(Mac) to fill the determination with the Foreground shading, which is set to dark. Once more, nothing appears to have occurred in the archive, and that is on account of the picture on “Layer 1” at the best is as yet blocking everything else from seeing, yet in the event that we take a gander at the thumbnail for the clear layer in the Layers palette, we can see that the chose territory has to be sure been loaded with dark.
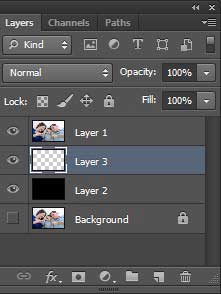
Seven: Create a Clipping Mask from the Filled Selection
We will utilize the determination we simply loaded with dark to make what’s known as a cut-out cover for the layer above it. This means the layer above it, “Layer 1” which contains the duplicate of our picture, will be “cut” by our filled determination on the layer beneath it. At the end of the day, the main piece of the picture on “Layer 1” that will stay obvious is the part specifically over the segment loaded with dark. Whatever is left of the picture will end up avoided see.
To make our cut-out cover, tap on “Layer 1” to choose it in the Layers palette. At that point go up to the Layer menu at the highest point of the screen and select Create Clipping Mask. You can likewise utilize the console alternate route Alt + Ctrl + G (Win)/ Option + Command + G (Mac). In any case, Photoshop “cuts” the picture on “Layer 1”, keeping just the territory over the dark filled shape beneath it unmistakable and concealing whatever remains of the picture, uncovering our dark foundation on “Layer 2” in its place:
You can change that we look in the Layers palette now. We can see that “Layer 1” is indented to one side with a little bolt pointing descending on the left. This shows the layer is being cut by the layer beneath it:
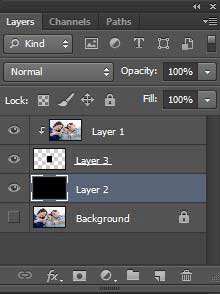
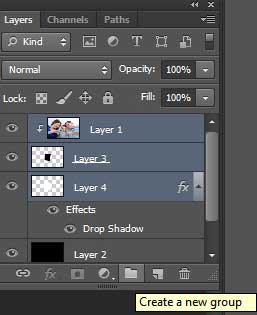
Eight: Add another New Blank Layer above “Layer 2”
We have to include another new layer, and we require it between the dark filled (“Layer 2”) and the layer containing our filled choice (“Layer 3”). To do that, tap on “Layer 2” to choose it and afterward click by and by on the New Layer symbol at the base of the Layers palette:
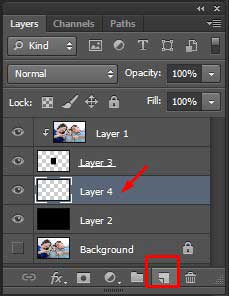
Includes the new layer between “Layer 2” and “Layer 3”. Names it, shockingly enough, “Layer 4”.
Nine: Drag Out another Rectangular Selection As The Border Of The Polaroid
With your Rectangular Marquee Tool still chose, drag out another rectangular choice, this time around the outside of the first choice, which will end up being the white fringe of the Polaroid. Remember that Polaroid photographs have some additional space at the base of the outskirt, so include some additional space at the base of your determination:

Ten: Fill the Selection with White
Since the fringe of a Polaroid is generally white. How about we fill our determination with white? Ensure that you have the new clear layer, “Layer 4”, chose in the Layers palette. At that point, since white is as of now our Background shading, how about we utilize the console alternate way Ctrl + Backspace (Win)/Command+Delete (Mac) to fill the choice with the Background shading (white). Press Ctrl+D (Win)/Command+D (Mac). We now have our first Polaroid in our picture:

Eleven: Add a Drop Shadow Layer Style
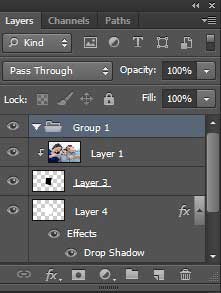
We have our first Polaroid and we will utilize it to effortlessly make the same number of Polaroid’s as we need. In any case, before we do whatever else! how about we add a slight drop shadow to it. We won’t have the capacity to see the drop shadow right now since we’re utilizing a dark foundation, however, we will see it once we begin heaping Polaroid’s over each other. To include our drop shadow, with “Layer 4” chose, tap on the Layer Styles symbol at the base of the Layers palette:
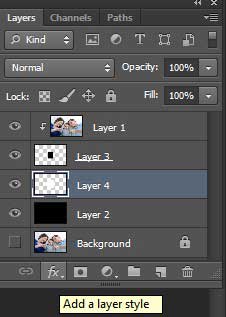
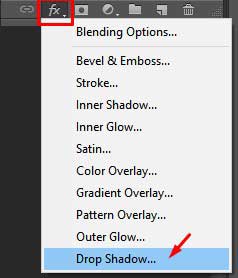
Twelve: Select Drop Shadow from the rundown of layer styles:
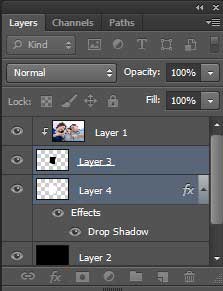
This raises Photoshop’s “Layer Style” exchange box set to the Drop Shadow alternatives in the center segment. I will set my shadow Angle to around 120° and afterward bring down the Opacity esteem at the best the distance down to around 30% so my shadow isn’t excessively serious:
Snap OK to exit out of the Layer Style discourse box. As I stated, we won’t have the capacity to see the drop shadow right now on account of our dark foundation, however, don’t stress. We’ll see it soon enough.
Thirteen: Rotate the Polaroid
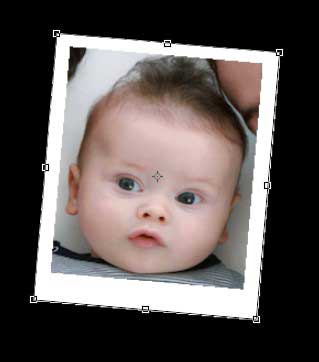
I will turn my Polaroid to add more enthusiasm to it. I have to choose the two layers in my Layers palette which make up my Polaroid.
As of now have “Layer 4” chose, which makes up the outside of it. However, I likewise require “Layer 3” chose. Which makes up within. So with “Layer 4” chose, I will hold down my Shift key and tap on “Layer 3”. Which will choose the two layers on the double (they’ll both show up featured in blue):
At that point with the two layers chose. I will raise Photoshop’s Free Transform handles around my polaroid utilizing the console alternate route Ctrl+T (Win)/Command+T (Mac). To turn it, I should simply drag my mouse cursor anyplace outside of the Free Transform handles. The mouse cursor will change to a “turn” cursor with bent bolts on either end of it. As I drag my mouse, the Polaroid will turn:

You can likewise move the Polaroid to another area in the event that you wish. By clicking on it and dragging it around the screen with your mouse.
Connect with the best image editing service provider- “Clipping Path EU” for getting the update with new image editing tips.
Learn more: Applying Color Effect in Photoshop

