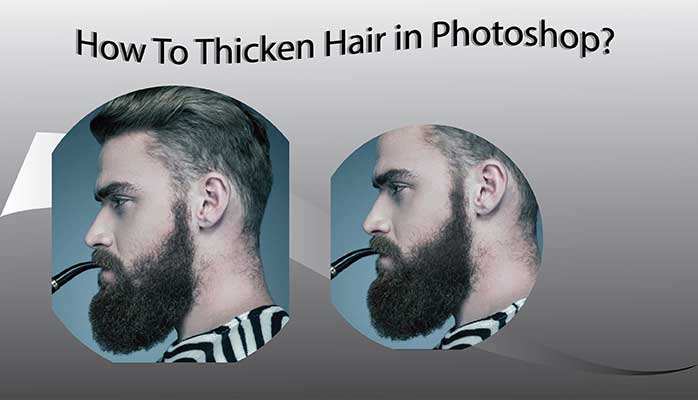
Making thicken hair naturally in Photoshop
Sometimes we are fetching trouble in our captured pictures. This causes most on Model Photography. While we captured a model face or Head here we look some natural gap in this model’s head.
In case you’re hoping to include volume and neaten up thicken hair, this Photoshop hair instructional exercise by the picture taker, modified and instructor Tags Rice will give all of you the tips and deceives you require. You’ll learn systems including how to ace the Liquefy apparatus, evade and consume, cloning utilizing the Darken mixing mode and a little touch of Frequency Separation.
Clipping Path EU– has utilized a male model here, and focused more on the whiskers – however, the Photoshop procedures depicted here will work for both male and female subjects and for hair on the highest point of their heads, facial hair and mustaches and somewhere else. This tutorial based on image masking service.
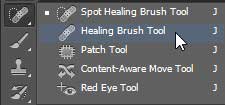
Step: 1
Open your picture and select the Healing Brush tool from Photoshop toolbar.

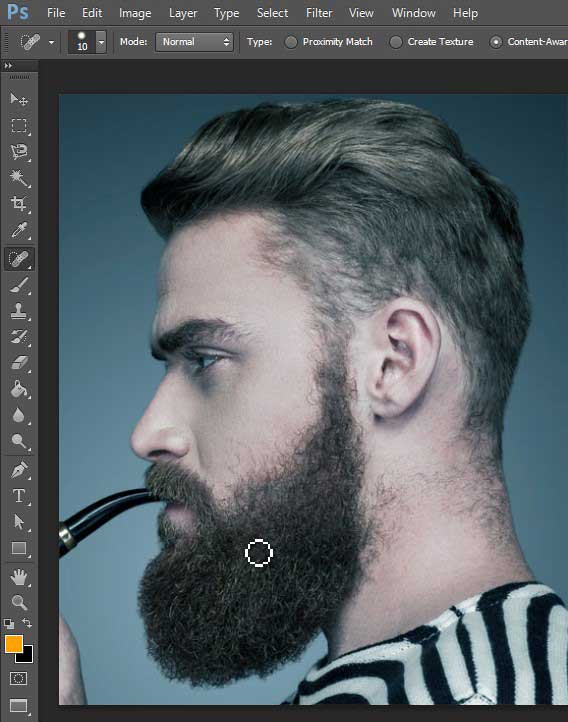
Step: 2
Evacuate any undeniable stray hairs around the edge of the hairline and facial hair.

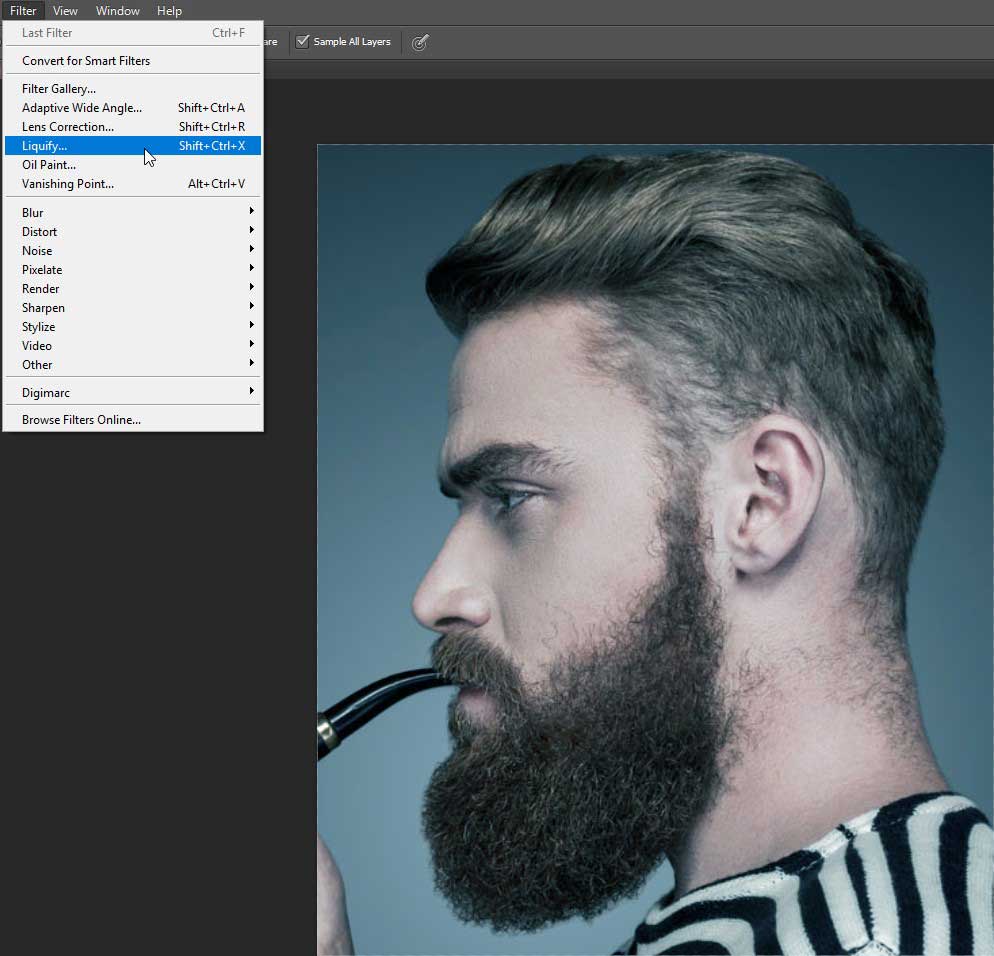
Step: 3
Next, go to Filter > Liquefy and utilize short strokes to give the principle hairline somewhat more volume. Particularly for this picture, here we additionally neatened up the back of the hairline excessively. You can see the outcomes in the subsequent stage.
Step: 4
This is the after effect of the past advance, with added volume to them.

Step: 5
In any case, with the Liquefy device, neaten the state of the facial hair a bit – here acquiring a portion of the hairs on the jaw. Be cautious – in the event that you go too far, the edges of the facial hair will look excessively flawless and it won’t look practical. So carefully handle it and maintain that.
Step: 6
Presently, how about we go and begin filling in some of those holes in the hair. To start with, make another clear layer and set its mixing mode to Darken.
Step: 7
At that point pick the Clone Stamp tool and set its mixing mode to Darken as well.

Step: 8
You additionally need to ensure your Clone Tool is set to Sample Current and below.

Step: 9
This ‘Obscure Clone’ instrument is extraordinary for filling in territories where you have a relatively indistinguishable source point to clone from.
Step: 10
Hold down Alt and snap with your pen or mouse to set your source point and after that brush in any regions, you require.
Step: 11
For a portion of the more troublesome territories, utilize an ‘Evade and Burn’ layer. Snap Cmd/Ctrl + Shift + N to raise the New Layer exchange box. Set the mixing mode to Soft Light and check Fill with Soft-Light-unbiased shading (half dim). Press OK
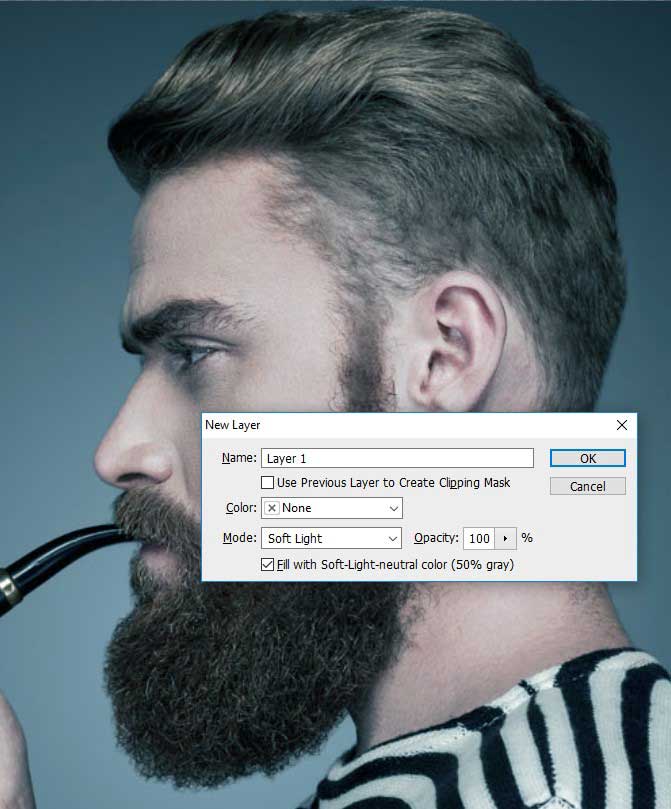
Step: 12
Select the Burn device and set its Range to Midtown and its Exposure to around 20%. At that point consume in a portion of the holes in the hair.
This will be particularly useful for the sides of the hair where the hairs are shaved and there is little in the method for detail.
Step: 13
Next, we will add more detail to the hair. To start with, change the Burn apparatus’ Exposure to 40%, and coordinate the brush size to the extent of the hairs on the facial hair.
Step: 14
Presently utilize the Burn apparatus to acquire more hair detail. You can likewise help a few zones of the hair if required.
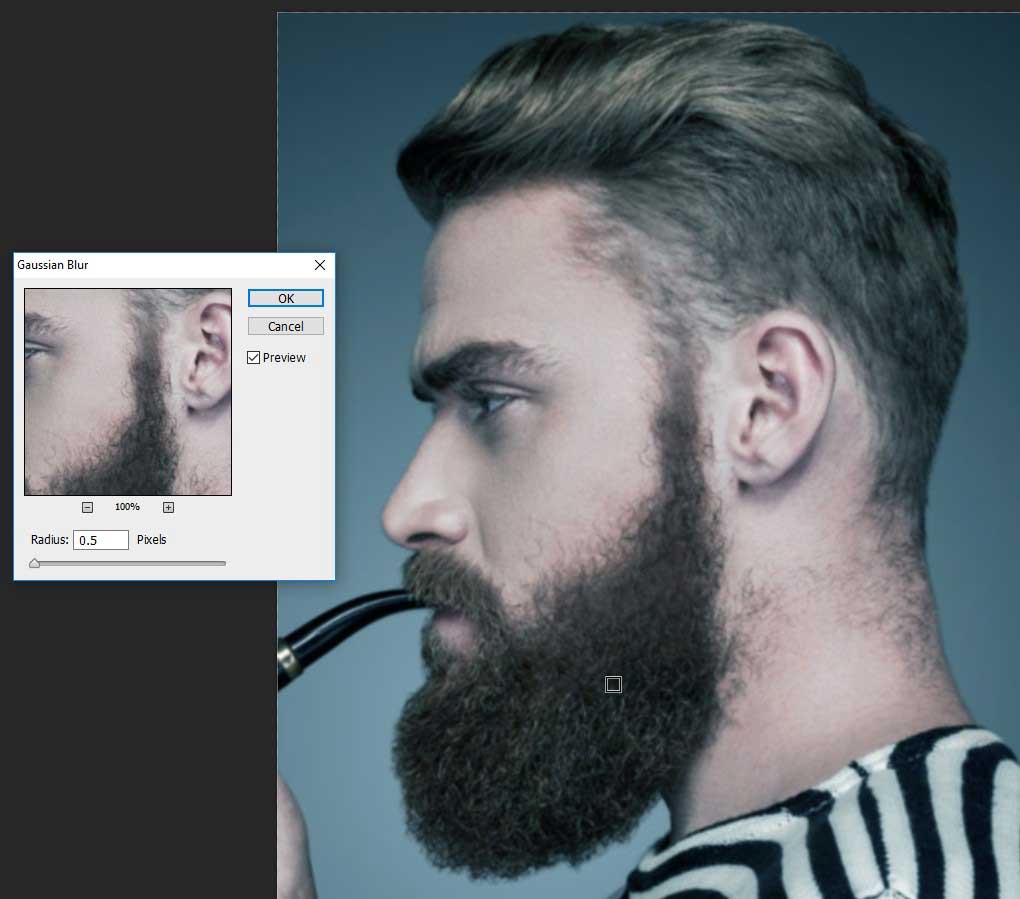
Step: 15
For those segments that need only some additional lift, how about we utilize Frequency Separation. To begin with, press Cmd + Alt + Shift + E to make another layer. Over the others with a straightened variant of the greater part of your noticeable layers.
Step: 16
In the Layers board, copy your picture twice and rename these to High Frequency and Low Frequency in the request appeared.
Step: 17
In any case, in the Layers board, conceal the High-Frequency layer by tapping the eye symbol and select the Low-Frequency layer.
Go to Filter > Blur > Gaussian Blur. You need to obscure the picture until the point that the sharp detail has gone.
Step: 18
Select the High-Frequency layer in the Layers board and turn on its deceivability once more. Go to Image > Apply Image… and duplicate the settings appeared in the exchange box above.
Once done then press OK.
Step: 19
At this moment your High-Frequency layer will be dark. Change the layer’s mixing mode to Linear Light and your picture should come back to its typical state.
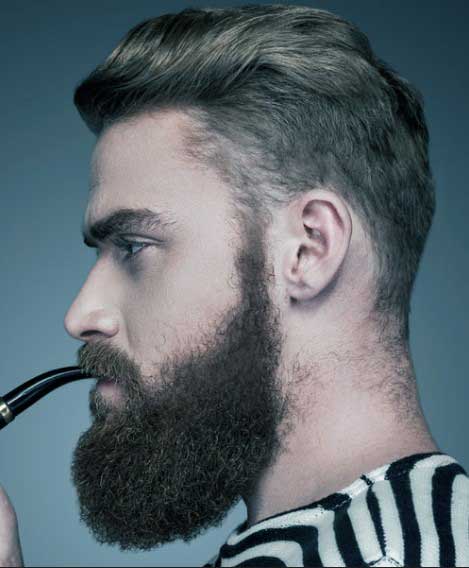
Step: 20
Presently we’ve isolated our picture by shading and surface, we can start our fundamental alter.
Make another clear layer between the High Frequency and Low-Frequency layers. This layer is the place we will non-ruinously include some hair tones to the skin.
Step: 21
Select the Clone device. Go to the instrument submenu at the highest point of your screen and set the example region to Current and below.
Pick a delicate edged brush and set the Opacity of your brush to somewhere close to 10-20%. Keep in mind to switch your Clone apparatus’ mixing mode back to Normal.
Step: 22
Hold down Alt and snap with your pen or mouse to choose your example territory and begin mixing and remedying the neighborhoods require consideration.
This is the stage you can be done it easily.
Nest Post: How to change Hair color in Photoshop Cs 6?
