
Modify your eCommerce Product Looks
In this instructional exercise, we demonstrate to you proper methodologies to tidy up. Also correct photographs of items to an expert standard. Promoting efforts draw in shoppers with proficient pictures of their items. As all Photography Businesses. Modifying is a basic advance in guaranteeing each picture is of an extraordinary quality and sufficiently high standard for print. Those in the business utilize programming for example. Photoshop to do this and by utilizing comparative devices with strategies. Similar expert outcomes can simply be accomplished at home utilizing your own particular photos. This tip helps to modify your eCommerce product looks more attractive.
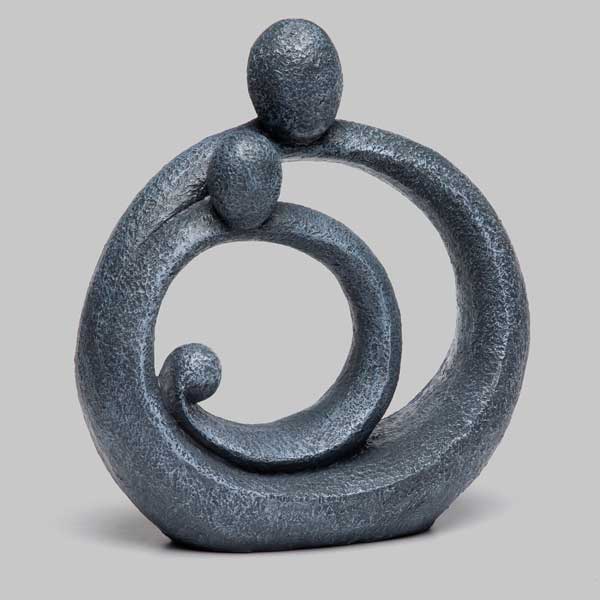
In this instructional exercise we will be demonstrating to you proper methodologies to modify an item shot like the professionals utilizing Photoshop CS6 and a formerly shot picture of an aroma bottle. Glass articles can be famously difficult to light and photo, with diverting reflections and refractions that can regularly demonstrate hard to correct or expel in postproduction. Nonetheless, by utilizing some basic change strategies in Photoshop we will demonstrate to you industry standards to amend, enhance and upgrade your shots. Controlling you through enhancing general picture introduction and differentiation close by evacuating any undesirable shading throws and clean particles to make that faultless complete we’re accustomed to seeing as buyers.
Take after alongside our basic well-ordered guide and set in motion some of our essential modify tips, which can enable you to get top-quality item shot outcomes that wouldn’t watch strange in a star’s portfolio.
Create another layer
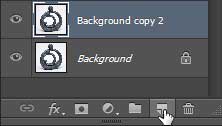
Open up you item photograph document in Photoshop. In the Layers palette, copy the first layer by Ctrl/right-tapping on the Background layer and choose Duplicate Layer. Rename this new layer ‘Presentation amendment’.
Cropping in
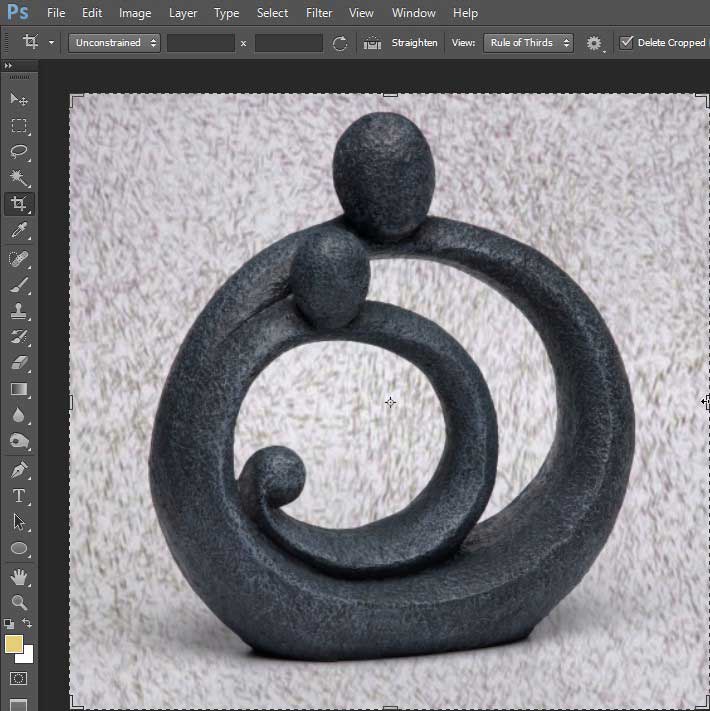
Select the Crop apparatus from the Tools bar and tap on the best corner of the picture, dragging the yield cursor slantingly down to the contrary base corner. Holding the Shift key to keep the first extents, pull up the base corner cursor, editing out the edges until you’re content with the situation of the fragrance bottle in the casing.
Adjust levels
Open a Levels modification layer to make revisions to the general picture introduction (Image>Adjustments>Levels). Start by pulling in the slider on the left-hand side (Highlights) of the histogram to where the rugged range starts to pick up stature. Presently move the midpoint (greys) slider along to make a punchier differentiate.
Clean up
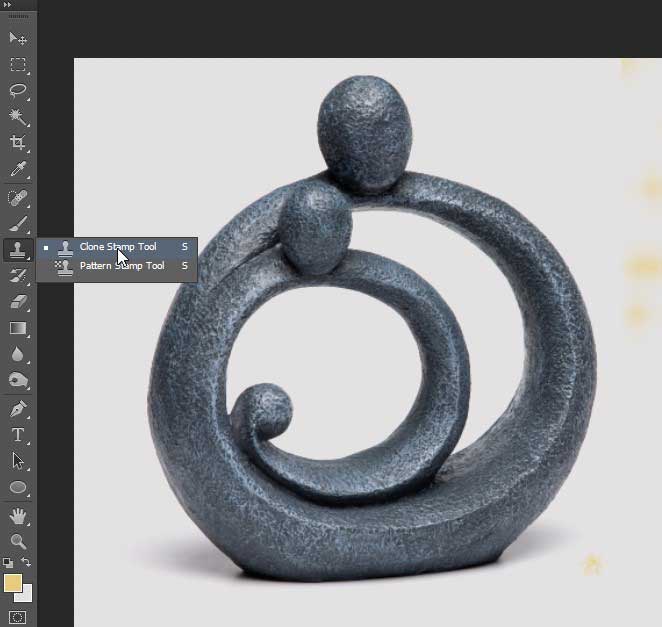
Presently make another new layer titled ‘Tidy up layer’ and select the Clone Stamp device that is situated in the Tools bar. Modify the brush settings so it has delicate edges and is estimated proportionately to the tidy spots that you need to evacuate (you may need to adjust this as you go). Keep the Opacity at 100%.
Cloning out
Zoom in to check for clear stamps and spots. Utilizing the effectively estimated Clone Stamp device select the territory besides the check holding down the Opt/Alt key to choose the perfect region. Put the cursor over the stamp you wish to expel and push down to clone it out.
Masking
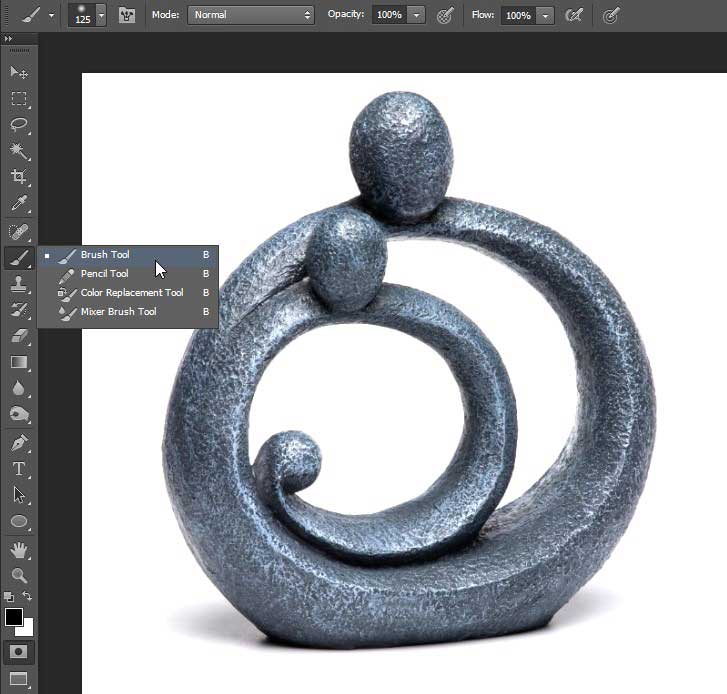
For harder-to-evacuate tidy blemishes on intelligent surfaces cut out the region utilizing the Quick Mask mode. Select the Brush apparatus with 100% Opacity and paint the territory, utilizing the Eraser instrument to adjust any blunders. Hit ‘Q’ to see the choice line and, when glad, go to Layer>New>Layer by means of Copy (or Cmd/Ctrl+J) to make a pattern of what you have covered.
You can do more steps for making it gorgeous-
Remove better clean
Select new layer and go to Layer > Filter > Noise > Medium and obscure the pixels with a 8px Radius, or something like that. Presently modify the Opacity of the layer to around 80%. Alter the layer by first choosing a Darken mixing mode and afterwards Linear Dodge. You can decrease the general layer darkness in the event that you have to.
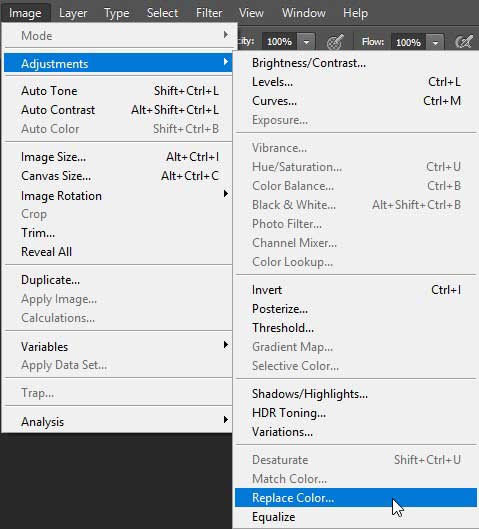
Replace shading
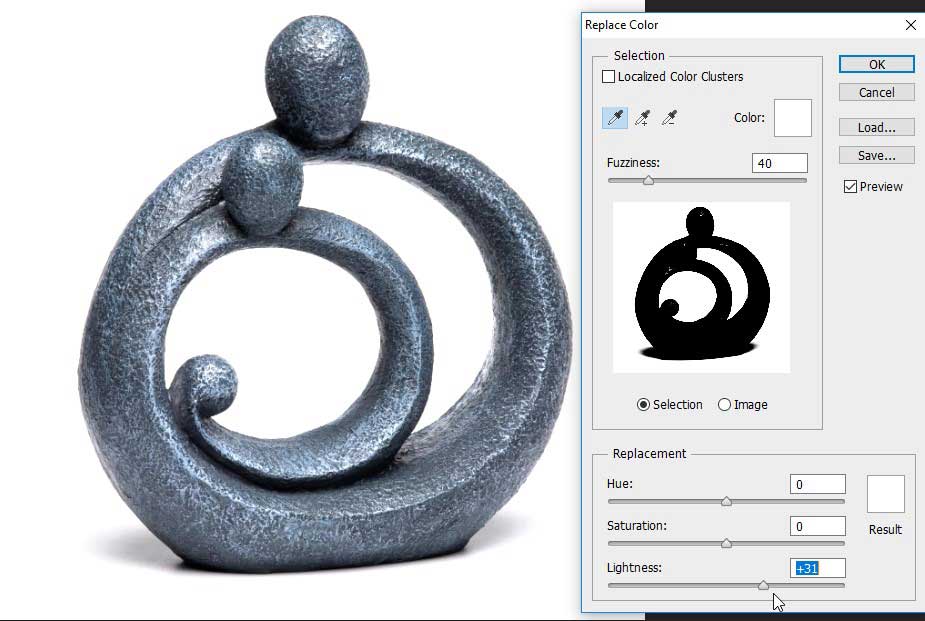
Indeed, even out the foundation shading by choosing Image > Adjustments > Replace Color. Utilize the Eyedropper device and tap on the darkest foundation territory, drag the Lightness slider up to light up out the dull areas and make an equitably white foundation. Ensure you zoom into your picture. Watchs that the white is the correct shine and mixes with the effectively existing white foundation shading.
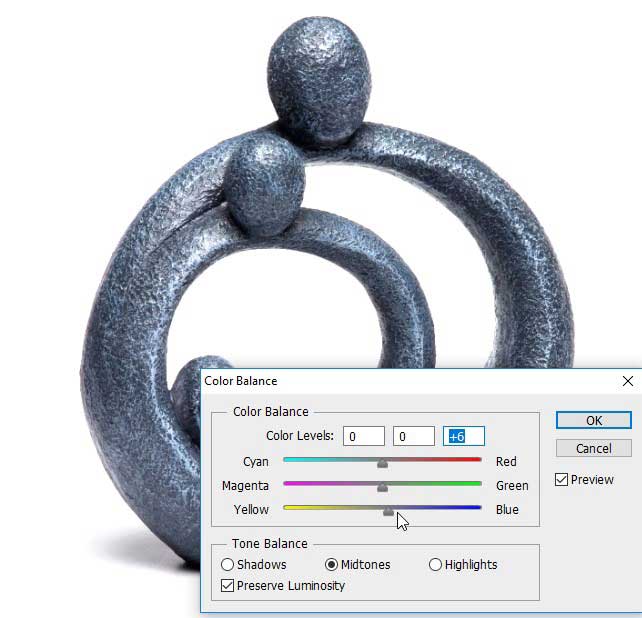
Colour rectification
Expel the hotter tones from the container and draw out the blues utilizing the Color Balance modification layer (Image>Adjustments> Color Balance). Empower Preserve Luminosity and start working your way through the sliders, changing through the Highlights, Midtone and Shadows. Ceaselessly flip the Preview catch on and off with the goal that you can see the changed outcomes as you come. Keep in mind. You don’t need to influence modifications with each slider; to work bit by bit for best outcomes.
Final touch-ups
Zoom into your picture and check for any undesirable imprints you may have missed that still should be cloned out. In the event that you need to make promote changes in accordance with the tonal range in the container utilize the Replace Color modification again and select a light blue region. Help this utilizing the Lightness slider gradually to keep away from cut-out-like outcomes.
Contrast and smooth
For the last difference, help utilize a Shadows/Highlights change layer. Truly push the Midtone Contrast slider for best outcomes. At the point when content with the last look spare. The layered record independently as a PSD document in the event that you wish to backpedal and alter further. Presently straighten your last picture layers (Layer>Flatten Image).
Sharpen up
Before you spare your last picture ensure it is sharp, adding definition to edges and enhancing the general quality. Go to Filter > Sharpen > Unsharp Mask and enact the Preview catch to screen the impact. Up the Amount to 100% with Threshold at 0 levels and bring the Radius up gradually to around 2.6px.
Resize
Presently you’ve influenced the last changes you’ll to need to resize it for web or print utilizes. For a decent quality print, you should expand the picture determination to 300dpi (go to Image > Image Size > Resolution). For web utilize, diminish the determination of a little esteem, for example, 72dpi.
Saving
Keep in mind to add watermark to your pictures. You transfer them with a guarantee that they are without copyright. Once your work has been accurately resized to suit your yield you should spare the last picture as a JPEG record (File > Save As > Format: JPEG) and afterwards print out for your portfolio or transfer to your online display. This is the way to modify your ecommerce product. You can also check our ecommerce product image editing service.
This is a post of Clipping Path EU blog. Connect with us and get more tips.
Learn more: Graphic design, branding & photography trends in 2018


