whitening your Teeth in Photoshop
whitening your Teeth in Photoshop: Clipping Path EU- express their image editing tips for sharing their design knowledge. This company is the very first quality service provider of Clipping path with 100% quality insuring.
Stage 1: Select the Lasso Tool
Begin by drawing a determination around the teeth. Select the Lasso Tool from the Toolbar:
Stage 2: Draw a Selection around the Teeth
In case you’re taking a shot at a photograph with at least two individuals in it, as I am here, you might be enticed to choose and brighten everybody’s teeth without a moment’s delay. In any case, the issue is, everybody’s teeth are unique and more often than not require distinctive measures of brightening. You’ll improve comes about by brightening one individual’s teeth at any given moment. I’ll begin with the man on the left.
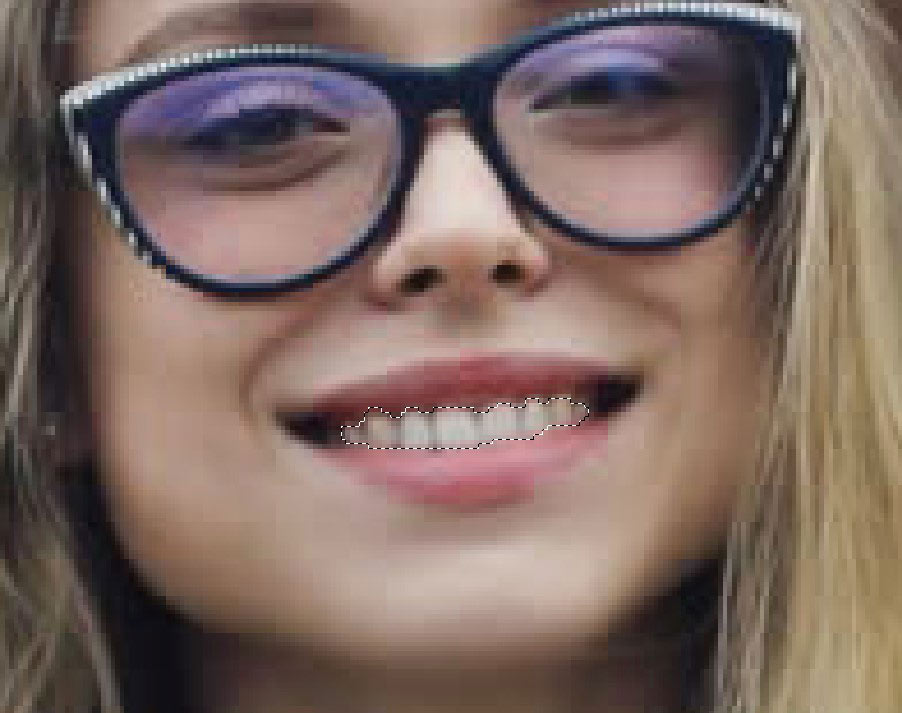
Draw a choice between the teeth. Try not to stress if it’s not the most exact determination since we can undoubtedly tidy it up later. Simply follow around the teeth, remaining as near to the edges as could reasonably be expected:
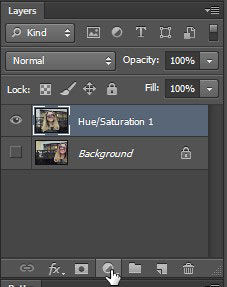
Stage 3: Add a Hue/Saturation Adjustment Layer
Tap the New Fill or Adjustment Layer symbol at the base of the Layers board:
Tapping the New Fill or Adjustment Layer symbol.
Pick Hue/Saturation from the rundown:
Choosing a Hue/Saturation alteration layer.
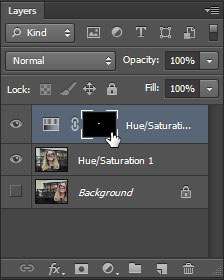
A Hue/Saturation alteration layer shows up over the Background layer:
The alteration is included in the picture.
Stage 4: Change the Edit Option to Yellows
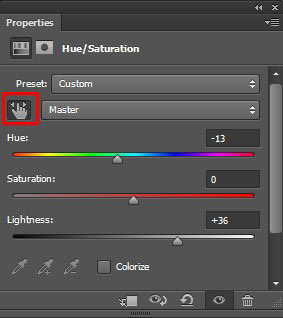
The controls and choices for the Hue/Saturation modification layer are found in Photoshop’s Properties board. Of course, Hue/Saturation influences all hues in the picture similarly, and that is on the grounds that the Edit choice is set to Master:
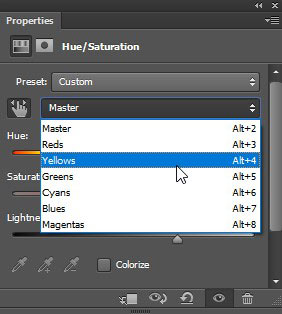
To alter just the yellows in the picture so we can expel the yellow from the teeth, change the Edit choice to Yellows:
Stage 5: Lower the Saturation Of The Yellow
Tap on the Saturation slider and start dragging it to one side. The further you drag, the more you’ll desaturate the yellow in the teeth, making them more white. Remember, however, that teeth normally have some yellow in them. In the event that you drag the Saturation slider the distance to one side, as I’m doing here:
Dragging the Saturation slider to – 100.
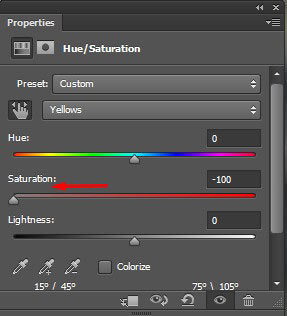
You’ll evacuate the yellow totally, bringing about teeth that look dull and dead:
Grayish-white isn’t a sound search for teeth.
Rather, watch out for your picture as you drag the slider and leave simply enough yellow to keep the teeth looking common. The setting you need will rely on how yellow the teeth were in the first place. For my picture, a Saturation estimation of around – 80 functions admirably:
To better judge, the outcomes, think about the brightened variant of the teeth with what they looked like initially. In the Layers board, tap the Hue/Saturation alteration layer’s permeability symbol. Snap it once to briefly conceal the impacts of the change layer and view the first picture. Snap it again to play Judas on and see the brightened adaptation:
Flipping the change layer on and off with the permeability symbol.
Here’s a when examination demonstrating the change up until this point. The left 50% of the teeth are what they looked like initially. The correct half is what they look like subsequent to evacuating most (however not all) of the yellow:
Stage 6: Change the Edit Mode Back To Master
We’ve brightened the teeth, so now how about we light up them. Change the Edit choice in the Properties board from Yellows back to Master so we can modify all hues without a moment’s delay, not only the yellows:
Setting Edit back to Master.
Stage 7: Drag the Lightness Slider To Brighten The Teeth
Tap the Lightness slider and start dragging it towards the right. The further you drag, the lighter the teeth will show up. Watch out for your picture as you drag the slider so you don’t light up them excessively. For my picture, a Lightness estimation of around +20 functions admirably
Expanding Lightness to light up the teeth.
The teeth are currently looking brighter. However, contingent upon how exact you were while choosing the teeth with the Lasso Tool, you may see a few zones around the teeth that have additionally been lit up. For my situation, there’s some undesirable lighting up in the lips and gums along the best and base of the teeth. We’ll tidy up these regions next:
The teeth have been lit up, yet so have regions around the teeth.
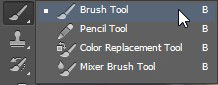
Stage 8: Select the Brush Tool
A pleasant element of change layers in Photoshop is that they incorporate an inherent layer cover. In the Layers board, we see the layer cover thumbnail on the Hue/Saturation change layer. The thumbnail is filled generally with dark, with just a little territory loaded with white. The dark speaks to the regions in our picture that are not being influenced by the modification layer. The white is the region that is being influenced. Photoshop utilized our underlying Lasso Tool determination to make the layer cover for us, filling the territory we chose (the teeth) with white and filling everything else with dark:
The layer veil thumbnail for the Hue/Saturation change layer.
To tidy up the territories around the teeth, we should simply paint on the layer cover with a brush. Select the Brush Tool from the Toolbar:

Choosing the Brush Tool.
Stage 9: Set Your Foreground Color to Black
We have to paint over the undesirable regions with dark. Photoshop utilizes our present Foreground shading as the brush shading, which implies we have to set our Foreground shading to dark. The present Foreground and Background hues show up in the shading swatches close to the base of the Toolbar. The swatch in the upper left is the Foreground shading. The swatch in the lower right is the Background shading. In the first place, press the letter D on your console. This resets your Foreground and Background hues to their defaults, influencing your Foreground to shade white and your Background shading dark. At that point, to swap them and set your Foreground shading to dark, press the letter X on your console:
![]()
The Foreground shading (upper left) ought to be set to dark.
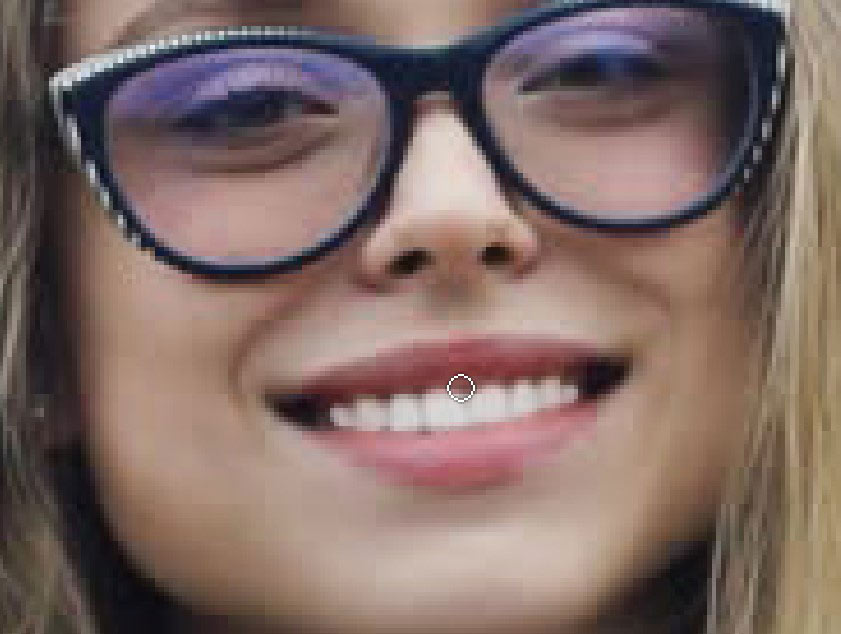
Stage 10: Paint around The Teeth To Clean Up The Area
Paint around the teeth to tidy up any issue territories. A little, delicate edge brush will work best. You can change the extent of your brush from the console. Press the left section key ( [ ) more than once to make the brush littler or the correct section key ( ] ) to make it bigger. To make the brush milder, press and hold Shift while squeezing the left section key, or hold Shift and press the correct section key to make the brush edges harder.
Here, I’m painting along the upper lip and gum line over the teeth to expel the brightening and lighting up from those zones. Since we’re painting on the layer veil, not on the picture itself, we don’t see the brush shading as we paint. Rather, the impacts of the Hue/Saturation alteration layer vanish:
I’ll paint along the base edges of the teeth also to expel the brightening and lighting up from the lower lip:
In the event that you commit an error and unintentionally paint over the teeth, press the letter X on your console to swap your Foreground and Background hues. This sets your brush shading to white. Paint over the mix-up to bring back the brightening, and afterward squeeze X again to set your brush shading back to a dark and keep painting. Clipping Path EU Ltd provided Clipping Path Service at the affordable.
I’ll paint away the rest of the issue zones on the left and right sides of the teeth, and here’s the outcome. The teeth are presently looking more white and brighter while the zones around them are back to typical:
The teeth are solid, aside from one region. There are three base teeth on the correct that were at first darker than the others due to shadows being thrown on them. Subsequent to lighting up the teeth with the Lightness slider, those three teeth now watch blurred and washed out:
To settle an issue this way, you can decrease the impact of the Hue/Saturation change layer on particular teeth by painting over them with dark utilizing lower brush murkiness. You’ll discover the Opacity choice in the Options Bar. I’ll bring down mine from 100% (the default setting) down to half:
At that point, with my brush shading still set to dark, I’ll paint over those teeth to reestablish a portion of their unique splendor. When you’re set, make sure to set the murkiness back to 100%, else you’ll get surprising outcomes whenever you utilize the brush:
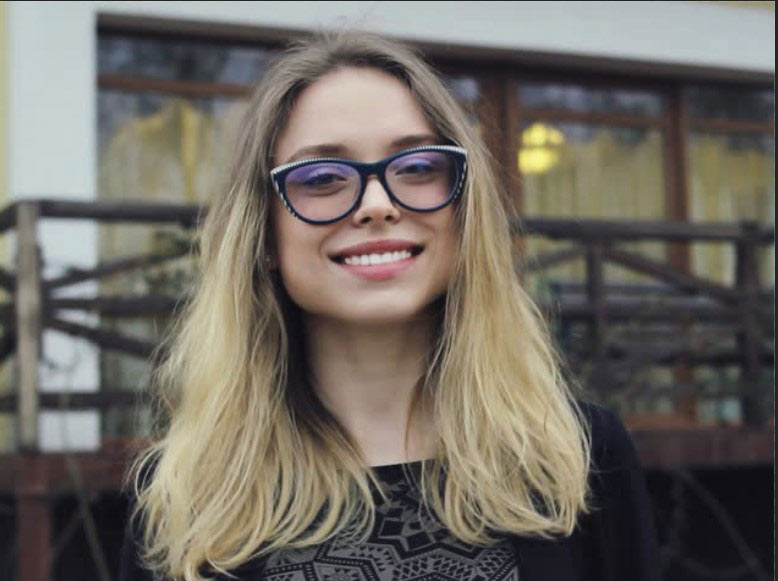
I’ll zoom out so we can see the last outcome. Up until this point so great. The man’s teeth are looking more white and brighter. By correlation, the yellow in the lady’s teeth has turned out to be more perceptible:
The come about in the wake of brightening and lighting up the man’s teeth.
As I specified before, for best outcomes when brightening teeth for at least two individuals in a similar photograph, you’ll need to utilize a different Hue/Saturation modification layer for every individual. We’ve effectively experienced the subtle elements of each progression when I amended the man’s teeth, so I’ll experience them again rapidly here with the lady’s teeth to make sure we can perceive how to function with various alteration layers in Photoshop. To start with, I’ll reselect the Lasso Tool from the Toolbar. You can likewise choose the Lasso Tool by squeezing the letter L on your console:
- At that point, I’ll draw a determination layout around the lady’s teeth.
- Choosing the lady’s teeth with the Lasso Tool.
- Including A New Hue/Saturation Adjustment Layer
- I’ll tap the New Fill or Adjustment Layer symbol at the base of the Layers board:
- Tapping the New Fill or Adjustment Layer symbol.
- At that point I’ll indeed pick Hue/Saturation from the rundown:
- Including a different Hue/Saturation change layer for the lady’s teeth.
A moment Hue/Saturation change layer is included. The one at the best is the one I’ll be utilizing to brighten the lady’s teeth.
Read more: Instructions to Smooth Skin In Photoshop


