
Clipping Path EU– Express awesome tips on image editing service and Photoshop Tutorial. Today we share an amazing tip on Image Cropping / Resizing / Rotating. You can get also brief concept on Simple to Complex Clipping Path.
Rotate Photo
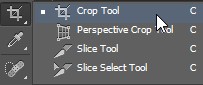
The primary thing we’ll learn is the manner by which to just pivot a picture by hand. We do that utilizing the Crop Tool. I’ll choose the Crop Tool from the Toolbar along the left of the screen:

When I select the Crop Tool, Photoshop encompasses the picture with an underlying harvest fringe. As we learned in the How To Crop Images instructional exercise, I could disregard this default edit fringe and rather snap and drag inside the picture to draw my own. Be that as it may since I need to pivot and fix the picture before I edit it, I’ll stay with the default trim fringe for the time being.
To influence the product to fringe more obvious, I’ll tap on the picture with the Crop Tool. This shows the Rule of
Thirds 3 x 3 lattice before the picture:

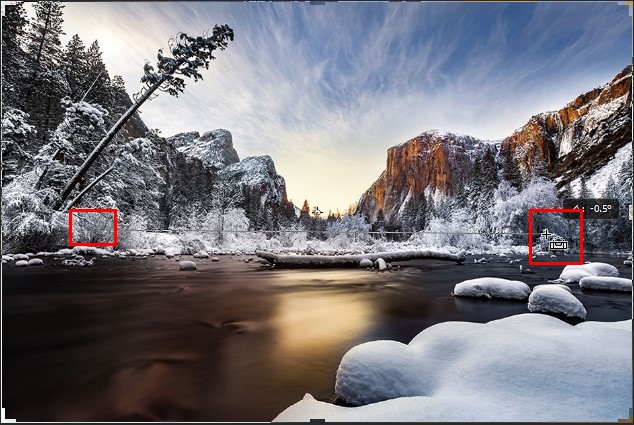
To turn the picture, move your mouse cursor anyplace outside the product fringe. Your cursor will change into a Rotate symbol (a bent line with a bolt on each end). I’ve zoomed in on it here to move a more intensive take care of my cursor outside the upper right corner of the picture:
The Rotate cursor shows up outside the yield outskirt.
With your mouse cursor outside the yield outskirt, click your mouse catch and hold it held down. When you click, the 3 x 3 lattice will change into a more point by point network:
An alternate framework shows up when you snap and hold your mouse catch.
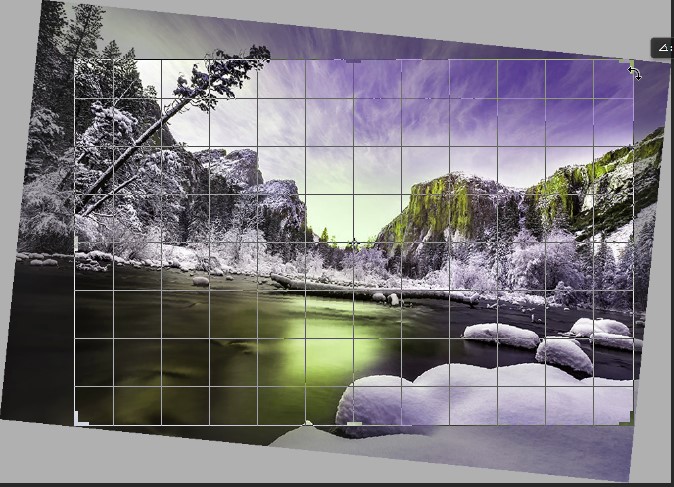
At that point, with your mouse catch still held down, drag your mouse to turn the picture. As you’re turning it, search for something in the picture that ought to be straight, either vertically or on a level plane, and endeavor to adjust it to the matrix lines. Here, I’m utilizing the water line just underneath the mountains as my guide:
Adjusting the water line with the lattice lines as I turn the picture.
Notice that as you pivot, Photoshop naturally resizes the yield outskirt to keep it inside the limits of the picture. Here, I’ve pivoted it too far to make sure we can perceive how much littler the yield fringe has progressed toward becoming:
Photoshop keeps the harvest fringe inside the picture limits as you pivot.
I’ll pivot the picture back to the way I had it so the water line and the level network lines coordinate:

Pivoting the picture until the point when it seems straight.
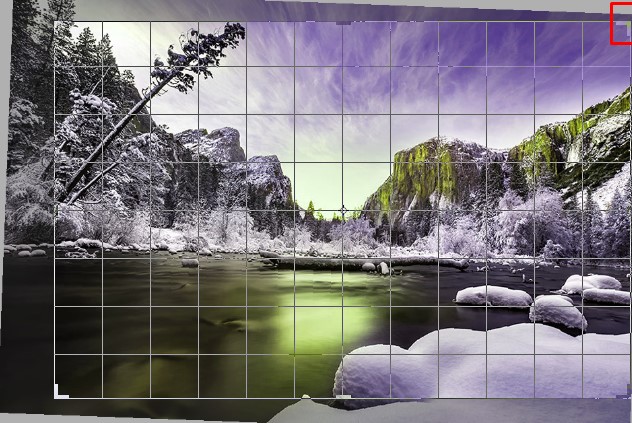
Once the picture looks straight, discharge your mouse catch. The overlay before the picture will change back to the Rule of Thirds 3 x 3 framework.
The Rule of Thirds network returns when you discharge your mouse catch.
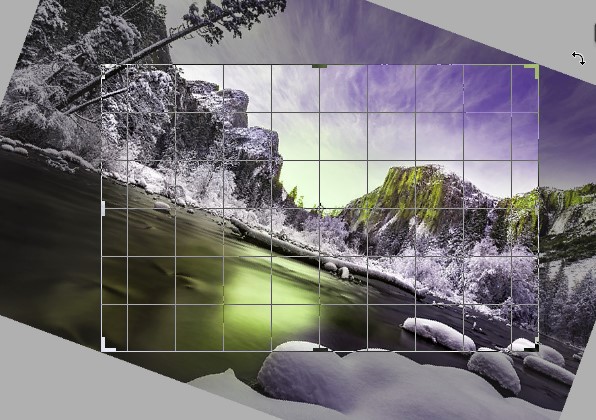
Now, you can resize the yield outskirt as required by clicking and dragging any of the handles around the fringe. I secured resizing the yield fringe in detail in our How To Crop Images instructional exercise, so here, I’ll rapidly resize the outskirt to make it somewhat littler, and I’ll snap and drag inside the product fringe to reposition the picture:
Resizing the product outskirt and repositioning the picture in the wake of turning it.
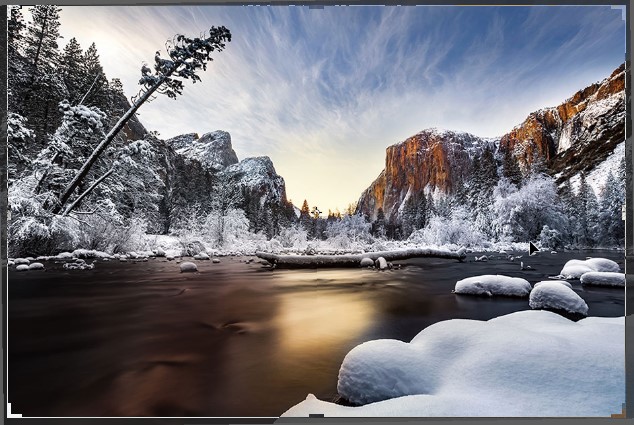
When you’re content with what things look like, press Enter (Win)/Return (Mac) on your console to confer the harvest. Here’s my outcome, a distinct change over the first form.
The turned and trimmed picture.
Instructions to Crop Images Non-Destructively In Photoshop CS6
The Straighten Tool
Up until this point, we’ve perceived how to pivot a picture by hand. We should take a gander at how to rectify a picture utilizing Photoshop’s Straighten Tool.
To start with, I’ll fix my yield by going up to the Edit menu in the Menu Bar along the highest point of the screen and picking Undo Crop. Or on the other hand, I could basically press Ctrl+Z (Win)/Command+Z (Mac) on my console:
Going to Edit > Undo Crop.
This profits my picture back to the way it looked initially:

Back to the first, uncropped picture.
The Straighten Tool is to some degree a shrouded apparatus in Photoshop. You won’t discover it anyplace in the Toolbar. Rather, you’ll see it in the Options Bar at whatever point you have the Crop Tool chose.
I’ll reselect the Crop Tool from the Toolbar.
To utilize the Straighten Tool, we first need to choose the Crop Tool.
At that point, with the Crop Tool dynamic, I’ll select the Straighten Tool from the Options Bar along the highest point of the screen:
 Choosing the Straighten Tool from the Options Bar.
Utilizing the Straighten Tool is extremely basic. Simply search for something in your picture that ought to be straight, either on a level plane or vertically, and draw a line crosswise over it with the Straighten Tool. Photoshop will then utilize the edge of the line to consequently turn and rectify the picture.
Since the water line in my photograph ought to be even, I’ll tap on its left half to set a beginning stage for the line. At that point, with my mouse catch still held down, I’ll drag crosswise over to the correct side of the water line to set the endpoint. Photoshop draws a thin, straight line between the two focuses:
Tap on one side of something that ought to be straight, at that point keep your mouse catch hold and drag to the opposite side.
When I discharge my mouse catch, Photoshop takes a gander at the point of the line and in a split second turns the picture with the goal that the water line seems straight. Notice that by and by, Photoshop has likewise resized the yield outskirt to keep it inside the limits of the picture:
Photoshop fixes the picture when you discharge your mouse catch.
Brisk Tip: Here’s a convenient tip for utilizing the Straighten Tool. You don’t really need to choose it from the Options Bar. Rather, with the Crop Tool dynamic, you can rapidly change to the Straighten Tool just by squeezing and holding the Ctrl(Win)/Command (Mac) key on your console.
Since the picture has been rectified, I’ll again resize my product fringe by dragging the handles, and I’ll snap and drag inside the outskirt to reposition the picture and modify the structure.
I’ll press Enter (Win)/Return (Mac) on my console to submit the harvest, and here’s the come about subsequent to fixing the picture with the Straighten Tool.
Read more: Adjustment of Brightness and Contrast in Photoshop