Adjust Hue and Saturation in Photoshop:
Color theory is an essential part of image editing works. We can realize that in every design and every creation is mixed with color. What we can see and what things we are taking in our everyday life are the mixer of color.

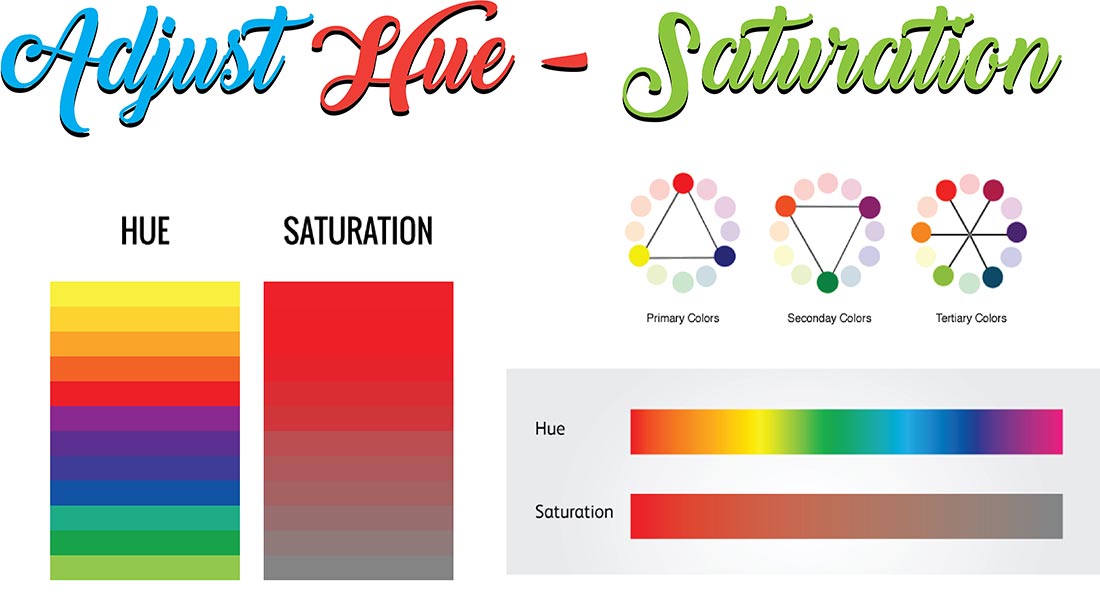
So, besides color, we need to grow our concept in color theory. As we are a graphic designer then we need the first things of Color theory. In the color theory, we have three important issue for adjusting the color- Hue, Value & Saturation.
Today we are going to learn about Hue and Saturation. This part is very important for growing up our color adjustment and designing sector.
Hue:
Shades are hues and what tone we see is reliant on the wavelength of light being reflected or delivered. Here is a question we have to reveal to you what shading is and since shading and tone are synonymous you should realize what a tint is too. One thing I will remind you about is we as a whole see shading in an unexpected way. The tone you see may not be a similar shade I see.
It is all the more particularly depicted by the predominant wavelength and is the primary thing we elude to while including the three segments of a shading. This is likewise a term which depicts a measurement of shading we promptly encounter when we take a gander at shading or its purest frame; it basically alludes to shading having full immersion, as takes after.
Hue has also three options- 1. Red 2. Green and 3. Blue. In Photoshop language it called “RGB”.
Saturation:
Saturation alludes to how unadulterated or exceptional a given shade is. 100% immersion implies there’s no expansion of dark to the shade. The shading is totally unadulterated. At the other extraordinary a shade with 0% immersion shows up as a medium dim. The more soaked (more like 100%) a shading is, the more striking or brighter it shows up. Desiderated hues, then again, seem blunter.
Saturation characterizes the splendor and force of shading. At the point when a shade tint is “conditioned,” both white and dark (dim) are added to the shading to lessen the shading’s immersion. As far as the “added substance” light shading model, however, immersion chips away at a scale in view of how much or how minimal different tints are spoken to in the shading.
Easily we can say that Saturation is the option of turning light up color into a low light up a color. Like Solid Red is the example of Hue and the opacity part of red color like- 90%, 80%, 70% is the Saturation.
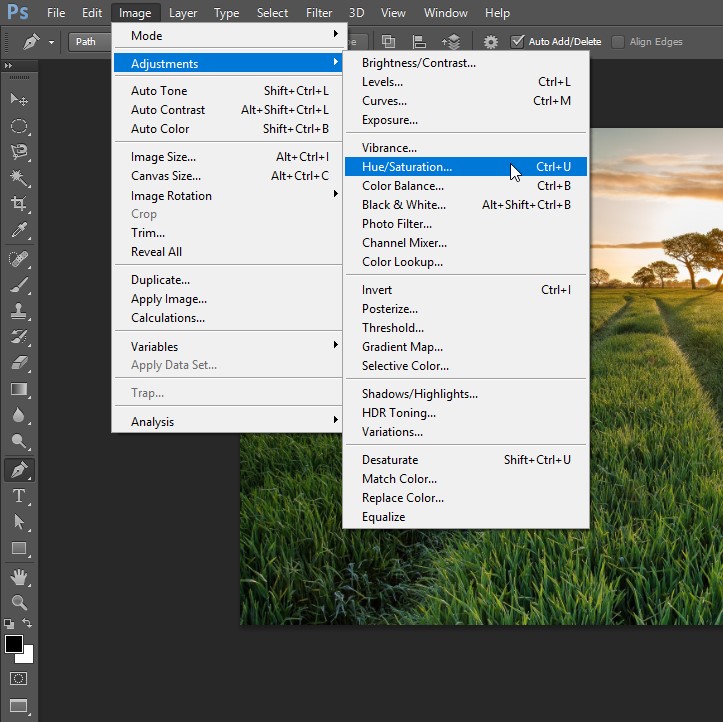
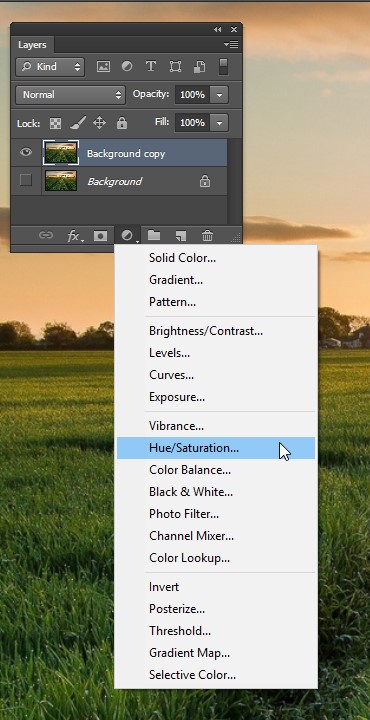
How can we (CPEU) adjust Hue and Saturation in Photoshop?
In Photoshop we found this option in a different way. Check this image below for clear concept-
First process:
Second Process:
 The Hue/Saturation charge in Photoshop Elements empowers you to change the hues in your picture in view of their shade, immersion, and gentility. Shade is the shading in your picture. Immersion is the power, or wealth, of that shading. What’s more, delicacy controls the splendor esteem.
-
In either Edit Full or Edit Quick mode, pick Enhance→ Adjust Color→ Adjust Hue/Saturation.
The Hue/Saturation exchange box shows up. Make sure to choose the Preview checkbox with the goal that you can see your changes. Note that this summons is additionally accessible in Guided mode.
Alter tint and immersion in the Hue/Saturation exchange box.
Alter tone and immersion in the Hue/Saturation discourse box.
- Select every one of the hues (Master) from the Edit drop-down menu or pick one shading to alter.
- Drag the slider for at least one of the accompanying credits to alter the hues as depicted:
- Shade: Shifts every one of the hues clockwise (drags right) or counterclockwise (drag left) around the shading wheel.
- Immersion: Increases (drag right) or declines (drag left) the extravagance of the hues. Note that dragging the distance to one side gives the photograph the presence of a grayscale picture.
- Daintiness: Increases the shine esteems by including white (drag right) or abatements the splendor esteems by including dark (drag left).
- The best shading bar at the base of the exchange encloses speaks to the hues their request on the shading wheel before you roll out any improvements. The lower shading bar shows the hues after you make your alterations.
You can make a fantastic color effect like this image- here we convert a sunny natural beauty image into a moonlit effect natural image.

Sunny Natural Image

Moonlit Night Effect
If you want to adjust the color on specific area then create a Clipping Path by Pen Tool and make a selection and then adjust hue saturation.
When you select an individual shading to alter, sliders show up between the shading bars with the goal that you can characterize the scope of shading to be balanced. You can choose, include, or subtract hues from the range by picking one of the Eyedropper instruments and clicking on the picture. This exchange box likewise gives you a chance to colorize pictures, a valuable alternative for making sepia-hued pictures.
Video Tutorial: How To Adjust Specific Color With Hue and Saturation?
Next post: How to watermark photos in Photoshop?


