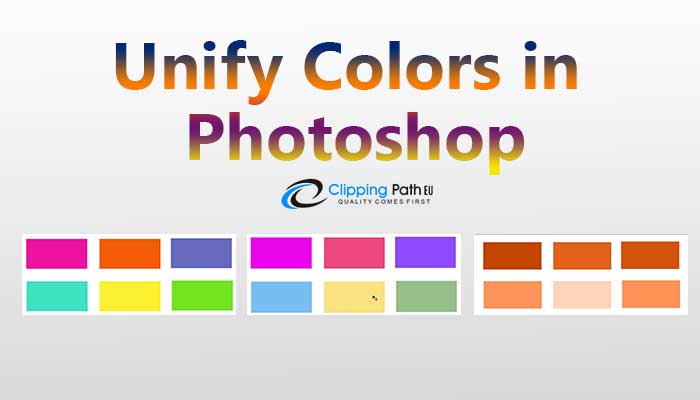
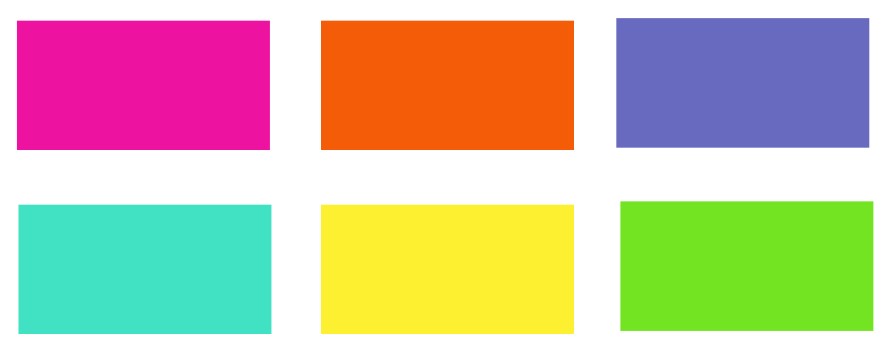
To begin with, we should take a gander at a rearranged adaptation of the issue and the arrangement. When we’re set, we’ll take what we’ve realized and applied it to a genuine photograph. Here’s a brisk plan I made in Photoshop utilizing six shapes, each loaded with alternate shading. Along the best, we have red, yellow and green, and on the base, we have cyan, blue and maroon. Get more image editing tips from “Clipping Path EU“. CPEU is the best image editing service provider including top quality Clipping Path Service.

In the event that I was planning something for, say, a tyke’s birthday party, this may work. Yet, by and large, I figure you would concur that there is an excessive number of various hues in this picture. As far as shading hypothesis, we would state that there is an excessive number of various tints, with “tone” being what a great many people consider as the real shading itself (rather than the immersion or delicacy of the shading).
So if there are an excessive number of hues, what would we be able to do about it? Indeed, we could simply change over the picture too dark and white which would absolutely take care of the issue. Or then again, we could bring together the hues so they look more like each other. How would we do that? We do it by either picking one of the current hues in the picture, or picking totally unique shading, and afterward blending that shading in with the others.
Picking a Unifying Color
In the event that we look in my Layers board, we see the picture sitting on the Background layer (I’ve smoothed the layers here just to keep things basic):
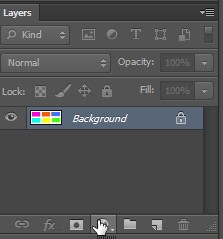
The Layers board demonstrating the picture on the Background layer.
To include one, I’ll tap the New Fill or Adjustment Layer symbol at the base of the Layers board:
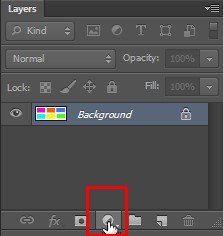
Tapping the New Fill or Adjustment Layer symbol.
At that point, I’ll pick Solid Color from the highest priority on the rundown:
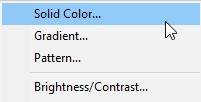
Picking a Solid Color fill layer
Photoshop will pop open it’s Color Picker where we can pick the shading we need to utilize. The shading you need may rely upon the state of mind you’re attempting to pass on or on the subject of a bigger, general outline. For this case, I’ll pick a shade of orange:
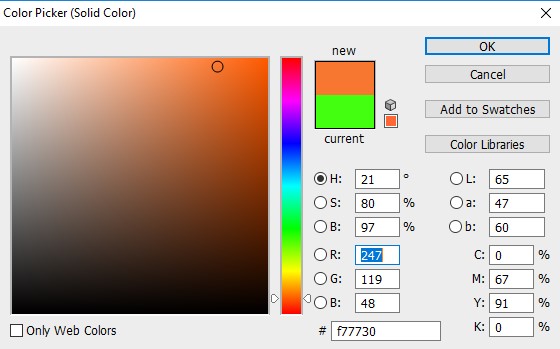
Picking shading from the Color Picker.
I’ll click OK to finish off of the Color Picker, and when I do, Photoshop fills the whole picture with my picked shading, incidentally obstructing my shapes from seeing. I’ve absolutely bound together the hues now, yet this isn’t generally the look I’m going for:

Photoshop fills the archive with the shading.
The reason that the shading is hindering the picture is on account of, on the off chance that we look in the Layers board, we see that Photoshop has put my Solid Color fill layer, named “Shading Fill 1″, over the picture on the Background layer. Any layer that sits above another layer in the Layers board shows up before that layer in the record:
The Layers board demonstrating the fill layer over the Background layer.
Related: Understanding Layers in Photoshop
Blending the Colors – The “Shading” Blend Mode
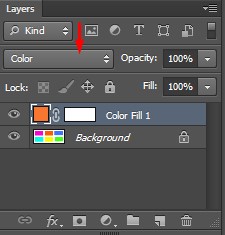
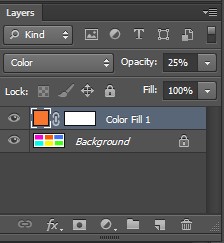
To mix my shading in with the picture’s unique hues, there are two things I have to do. In the first place, I have to change the mixing method of the Solid Color fill layer. You’ll discover the Blend Mode alternative in the upper left of the Layers board. As a matter of course, the mixed mode is set to Normal. I’ll tap on “Typical” and I’ll change the mixed mode to Color:
Changing the mixing method of the fill layer to Color
By changing the mixed mode to Color, we permit our Solid Color fill layer to influence just the hues in the picture underneath it. It never again has any impact on the tonal qualities (the brilliance) of the picture.
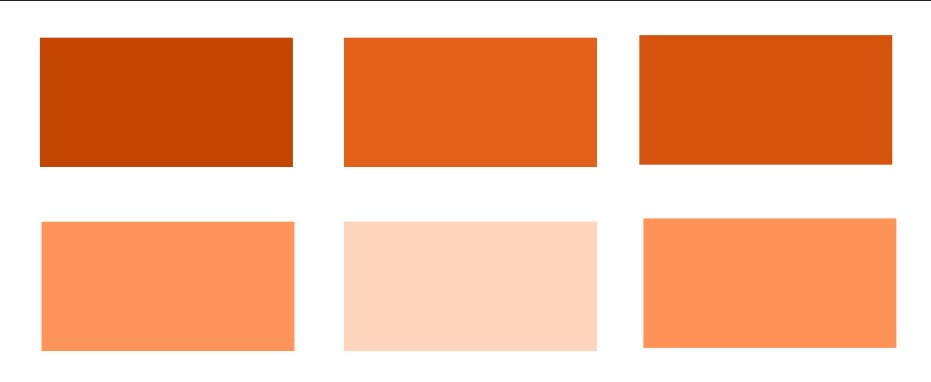
On the off chance that we take a gander at my archive in the wake of changing the mixed mode to Color, we see that my shapes are currently by and by obvious. In any case, as opposed to showing up with their unique hues, they now show up as various shades of similar shading (the shading I picked in the Color Picker):
The shapes re-show up, however now they’re all a similar tint.
The result of opacity 0 %
Blending The Colors – Layer Opacity
We’re in good shape, yet since our objective here is to make the hues more comparable, not influence them all the same to tone, despite everything I require an approach to blend the shading from the fill layer in with the first shades of the shapes. To do that, I should simply modify the mistiness of the fill layer. You’ll discover the Opacity alternative in the upper right of the Layers board, specifically opposite the Blend Mode choice.
Darkness controls the straightforwardness of the layer. As a matter of course, the murkiness esteem is set to 100%, which implies that the layer is 100% unmistakable. Bringing down the murkiness esteem makes the layer more straightforward, permitting the layer(s) beneath it to somewhat appear on the other side. On the off chance that we bring down the murkiness of our Solid Color fill layer, we’ll permit the hues from the first picture to appear through the fill layer’s shading, adequately blending the hues from the two layers together!
To demonstrate to you what I mean, I’m really going to begin by bringing down my darkness esteem the distance down to 25%:
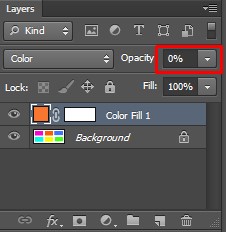
Bringing down the darkness of the fill layer to 0%.
At 0% darkness, the fill layer winds up 100% straightforward, and we’re back to seeing the shapes in their unique hues, totally unaffected by the fill layer:
The outcome with the Solid Color fill layer’s mistiness set to 0%.
Watch what happens, however, as I begin to build the fill layer’s murkiness. I’ll begin by expanding it to 25%:
Expanding the fill layer’s haziness to 25%.
By expanding the haziness to 25%, I’m advising Photoshop to blend 25% of the fill layer’s shading with 75% of the first hues, and here’s the outcome. Since each shape now has a portion of the orange from the fill layer blended into it, the orange is binding together their hues so they never again look so changed. The impact is unobtrusive right now, yet all things being equal, we would already be able to see that they’re ending up more comparable:
The outcome with the fill layer’s obscurity set to 25%.
In the event that I increment the haziness of the fill layer to half.
Expanding the fill layer’s obscurity to half
I’m currently blending half of the fill layer’s shading in with half of the first hues, and now the shapes are looking much more comparable:
The outcome with the fill layer’s obscurity set to half.
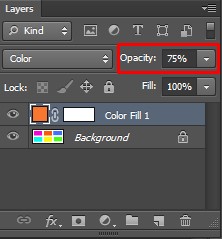
Also, on the off chance that I increment the fill layer’s mistiness to 75%:

Expanding the fill layer’s obscurity to 75%.
Photoshop is currently blending 75% of the fill layer’s shading with just 25% of the first hues, making an extremely solid shading subject:
The outcome with the fill layer’s obscurity set to 75%.
Changing the Unifying Color
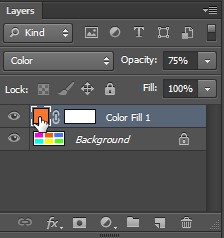
Up until now, I’ve been utilizing orange as my binding together shading, yet I just picked orange since, well, I simply happen to like it. Imagine a scenario where I need to change the shading. I should simply double tap on the fill layer’s shading swatch in the Layers board:
Double tapping on the shading swatch.
Photoshop re-opens the Color Picker, enabling me to pick alternate shading. This time, I’ll pick a pinkish purple:
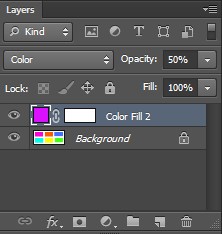
New solid color layer
Picking shading from the Color Picker.
I’ll click OK to finish off of the Color Picker, and simply like that, I’ve in a flash changed the shading subject of my shapes:

The come about in the wake of changing the fill shading
Right now, despite everything I have the haziness of my fill layer set to 75%. In the event that the impact is excessively solid, all I require, making it impossible to do is bring down the darkness. I’ll drop it down to half.
Bringing down the fill layer’s haziness to half.
What’s more, now, the shapes are as yet being bound together by the new shading, however, the impact is more unobtrusive.
Learn more: Using of background eraser Tool


